


Smaller Wheels
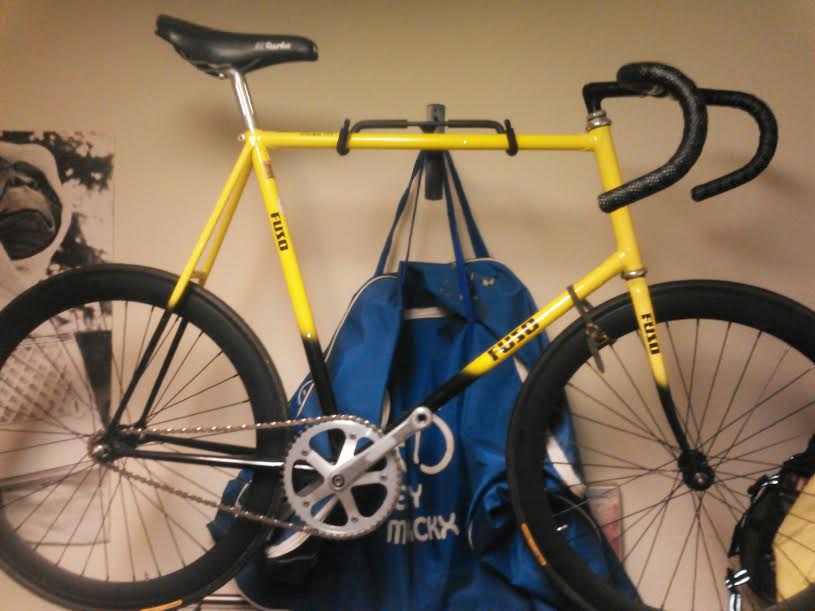
I was recently sent a picture of a Fuso track bike I built around 1990. It is different in that it has smaller 650C wheels. At the time this smaller tire size was becoming popular with triathletes with much talk of them being “Faster.”
People in the know, such as myself and Terry Shaw, owner of Shaw’s Lightweight Cycles in Santa Clara, just south of San Francisco, knew there could be little or no advantage. However, Terry Shaw thought that if there was an advantage, it might be in the initial jump during a sprint race on the track.
Smaller wheels have the effect of lowering the gear ratio, so this would have to be compensated with more teeth on the chainring, or less teeth on the rear sprocket. And so if you have two bikes with the same gear ratio, where is the advantage? Except that smaller wheels and tires have to be marginally lighter.
It interested us both enough that I agreed to build Terry Shaw a track bike that he would ride himself. The only way to test the theory was to actually race on it.
Building a bike with smaller wheels changes the whole design of the frame. The front fork is shorter, so the head tube is longer as you can see in the photo above of a 60 cm frame. It looks larger because one is used to judging frame size by the length of the head tube.
With the wheels being a smaller radius, the angle of the down tube and chainstays has to be altered to in effect raise the bottom bracket. Smaller wheels also means less trail, so to compensate the fork rake or offset was shortened to increase the trail. This was a scant 20 mm or roughly ¾ inch, and is also evident in the above photo.
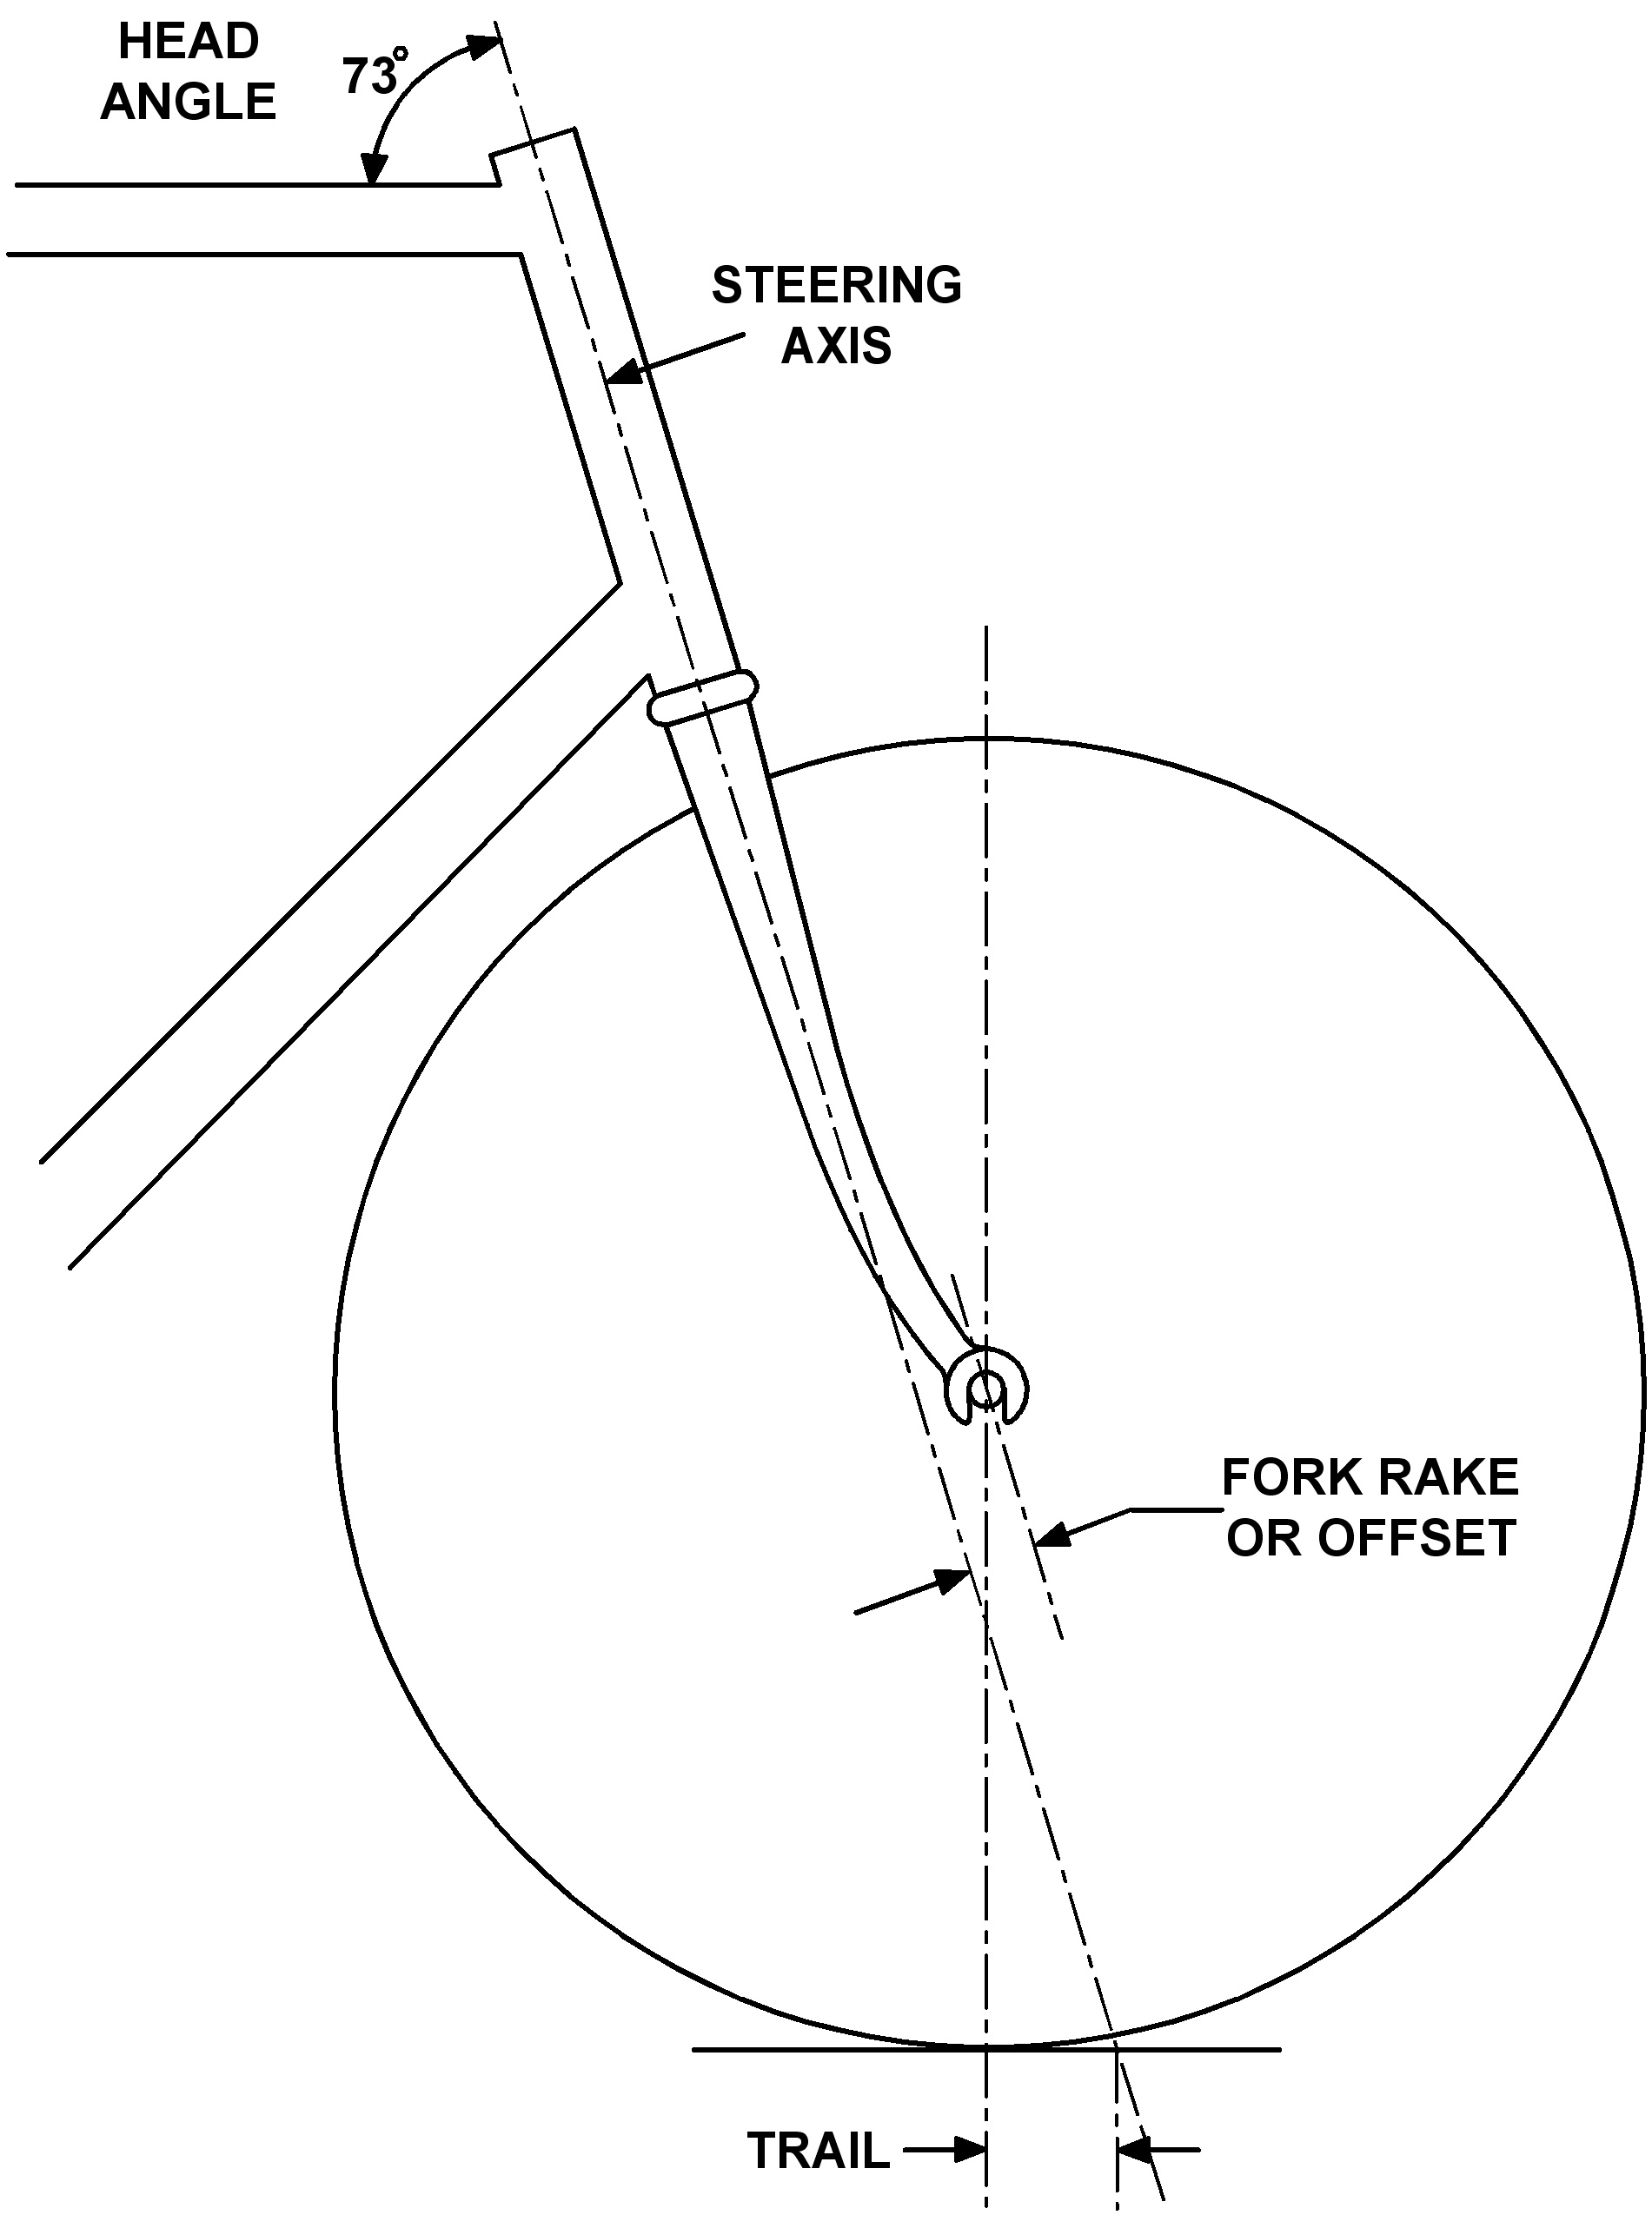 For readers who don’t fully understand the concept of “Trail” and how it affects steering, here is a drawing.
Draw and imaginary line through the steering axis and it reaches the ground at a point in front of where the wheel actually contacts the ground. The wheel therefore pivots about that point of contact.
This provides a castor action and the wheel trails along behind the steering axis, Hence “Trail.”
Looking at the drawing you should be able to see why smaller diameter wheels makes for less trail.
A steeper head or steering angle also makes for less trail. More rake or offset means less trail, less rake, more trail. Which is why this frame had a far sorter fork offset.
The drawing is for a road bike, the trail makes for a bike that will hold a straight line, and also gives some self-steering characteristics when cornering. A track bike typically has less trail, because it is designed to be ridden on a banked velodrome, where the banking has the effect of riding in a straight line.
The rider needs a quick handling bike, one that the rider can physically steer and change direction easily. It calls for a bike with a steeper head angle and less trail than a road bike.
So now I have explained what went into the design of the frame, how did it perform? Terry Shaw raced it for a whole season, but then went back to his conventional track bike with 700C or 27 inch wheels. He reported the bike was faster in the initial jump, but was harder and required more effort to keep it rolling once top speed was attained. So no real advantage.
The one pictured above may or may not be Terry’s actual bike, because I built one other for a customer of Shaw’s Cycles. Soon after this I did design and built a TimeTrial/Triathlon bike for a trade show. I can’t show you a picture because it was later sold to a bike store in Del Mar near San Diego, and I never saw it again. I have no idea where it is now and would love to know.
It was an interesting design concept. It had a 650C front wheel with a fork with even less rake than the track bike above, it also had a steeper head angle. With the rear wheel there was the option to use either a 700C or 650C wheel. There was an aluminum adapter plate that bolted on to special braze-ons on the seatstays to accommodate the different brake heights.
When the larger rear wheel was used it of course raised the rear end making the frame angles steeper, including the head angle. This changed the trail and the handling characteristics. To compensate the front fork brake mount was made so the fork could be turned and the fork blade was curved backwards like a motor-pace or stayer bike.
This increased the trail to compensate for the loss of trail due to the steeper head angle. The head angle and the fork blade offset was designed for optimum handling in either set up. In test runs it handled beautifully, but I only ever built the one.
My thinking was to use the larger wheel for flat and straight courses, and the smaller rear wheel for technical courses with a lot of twists and turns, where faster acceleration out of corners might help.

![]() To Share click "Share Article" below
To Share click "Share Article" below
 Dave Moulton


Minimalist
I always took the minimalist approach to frame design and building. Less is more, and why do more than is necessary, especially if it doesn’t improve the end product. My bottom bracket gear cable guides were an example of this.
On my custom frames I filed two grooves with the corner of a square file, brazed a piece of wire across the groove, and then drilled a hole through. (See picture above.)
When I started production on the John Howard frames in 1983 and the Fuso a year later, I simplified the procedure. I filed two grooves with a small round file, took a short piece of automotive steel brake fluid line and brazed it in the groove, finishing it off by chamfering the edges with a hand held belt sander. Very simple and it did the job. (See below.)
There were always critics who questioned, “Isn’t it a bad idea to have the bare cable touching the paint.” To which I answered:
If I brazed a channel that covered the whole area where the cable went around the bottom bracket shell, it would then be painted and the cable would still run on the paint. It would take longer to produce, look ugly, and not really improve anything.
Throughout the 1970s gear cables were run through cable guides that were brazed to the top of the bottom bracket. These were of course painted along with the rest of the frame, and the cable ran on the paint, which is why I knew it would be okay. The cable runs in one position and the constant movement of the cable prevents it rusting. (See below, a 1972 Italian Masi.)
The cable guides on top of the bottom bracket collected dirt and made it harder to keep the bike clean in that area. By the 1980s framebuilders realized a neater and much simpler idea was to run the cables under the BB. It has been pretty much standard practice ever since.
Someone on Facebook questioned the cables running on the paint.
Why didn’t I do it this way? With a picture (Right.) of someone else’s frame.
As usually happens on the Internet others chime in with comments like, “Oh yea, that always concerned me too.”
Next I find myself writing lengthy explanations, getting really annoyed that I am having to justify something I did 30 years ago. Then I realized people send me pictures of the underside of the Bottom Bracket with the frame number stamped on it. I always save these pictures so I pulled up several from my archives.
Fuso frames numbering from 020 (Above.) to 693, old frames built from 1984 to 1986. All with original paint, some with the bare frame with the cables removed, showing surprising little wear at all. They say a picture is worth a thousand words, and it is true in this case. I have about 8,000 or 9,000 worth here.
So if this is something that has concerned you in the past, look at these pictures and realize you are worrying about a problem that doesn’t exist. The latter frames shown had BBs made by the Japanese Takahashi Company. These had the cable guides cast in the shell and I didn’t have to do a thing. The others were finished in the manner described earlier.
I am always willing to answer questions about my framebuilding practices, but please use a little respect and tact when doing so. When someone asks “Why did you not do it this way?” it is a direct insult, and implies I didn’t know what I was doing.
In 1985 I used it on the Recherche frames, it saved a lot of time and ended the controversy of cables running on paint.