


Headset Removal and Replacement
The great thing about vintage steel bikes is that you can work on them yourself with a few simple tools. Here is a job I will walk you through, namely the removal and replacement of the headset cups and bearings. I will explain how you can do this with a few simple items picked up at your local hardware store.
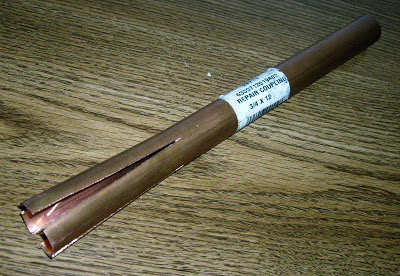
To remove the bearing cups from the frame I purchased a piece of copper tube. I found a ¾ inch repair coupling that was ¾ inch diameter inside and slightly under and inch outside. These come in various lengths; 12 inch long worked fine for my needs and the ends were already machined nice and square.
All I had to do was cut four slots down the length of the tube about 4 inches long, using a hacksaw, and bend the four pieces outwards as shown in the picture above. These squeeze in to insert through the headset cup and then spring out again inside the head tube. With a hammer or mallet, the cups can be safely knocked out of the frame.
This worked in exactly the same way as the professional Campagnolo tool that costs a great deal more. To remove the lower ring from the fork, I turned the fork upside down resting the threaded end on a wooden block, and drove the ring off with a hammer and flat punch.
It is necessary to tap first one side of the ring, then the other to get it to come off straight. The bottom ring was hardened steel so the flat punch did not damage it in any way.
To press the cups back into the frame I bought a 5/8 dia. nut, bolt, and several large flat washers. I pressed the top cup in first, which again was hardened steel, with the bolt facing up and the nut on top. Tightening the nut on the bolt squeezed the cup into the frame.
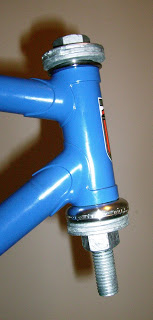 Then I removed the nut and bolt, reversed it and pressed the lower cup in. (See picture, left.) The bottom cup was light alloy so I placed the lower steel fork ring inside, upside down.
This brought it flush with the outside edges of the cup so the washers were pressing on the inner hardened steel bearing surfaces, rather than the soft alloy outer edge of the cup.
Don’t press the cups in with the ball bearings in place, or you may damage the balls or the bearing surfaces.
Finally, to drive the lower ring on to the fork. I found a short piece of one inch black iron pipe. This was slightly bigger than an inch inside so it slid easily over the steering column.
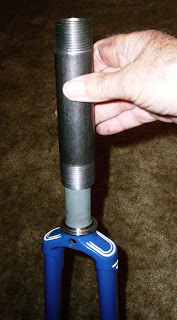 Holding the fork in one hand, I drove the bearing ring onto the crown race, using the piece of iron pipe as a sliding hammer. (See picture, right.)
Once again, because the lower ring is hardened steel the iron pipe did no damage.
The piece of iron pipe does not have to be threaded as shown here. It just happened to come that way, in the length and weight I needed to do the job.
Finally, use plenty of grease in the inside of the head tube. It will help the cups slide in and prevents corrosion in the future.
 Dave Moulton
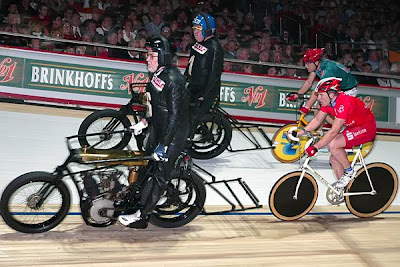


The constantly changing normal
Life is a constant change, new ideas, and new technology. People often hate change, they fight against it, but it is futile. Change will come for better or worse. In time we accept change, (Often we have no choice.) and a new “Normal” is established.
In the mid-1970s I wrote a series of articles on frame design for the British “Cycling” magazine. There was no Internet back then, no email, and no comments section where you could debate any ideas put forward. However, one older gentleman took the trouble to write and mail me a long hand-written letter, explaining my theories on “Trail” were wrong, and he enclosed a photocopy of an article from ‘Cycling’ dated 1946 to prove it.
It was thought that it made the steering of the bike sluggish.
Front forks had a rake (Offset.) of 3 to 3.5 inches. (76mm. to 90mm.) See the photo at the top, from the 1934 Tour de France, and the drawing, left.
I can even see where this idea gained traction.
At first glance it seems logical that the steering axis should reach the ground at the exact point the wheel makes contact and therefore turns at that point. Or it would make sense if a cyclist steered his bike by turning the handlebars, and the frame remained upright.
However, we steer a bicycle by leaning in the direction we wish to turn, and the steering axis ahead of the wheel’s point of contact, is one of the forces causing the wheel to turn in the direction of the lean. (See drawing below right.)
As far back as the late 1950s, early 1960s, I had realized that trail was a good thing, as had almost every other framebuilder. It provides a caster action, and gives the bike stability when going straight, and certain ‘self-steering’ characteristics into the corners.
However, trail goes hand in hand with the head angle. Steeper angles are more sensitive and need less trail to achieve the same self-steering qualities. As many framebuilders in the 1970s were building frames with 75 and even 76-degree head angles, their trail would have been a lot less than mine.
As well as staying with a 73 head angle with less rake, my overall geometry placed the rider’s weight more forward, which also affected the ‘feel’ of the steering. The point I am making, you cannot simply say fork rake should be this much, and trail should be this, without considering the whole frame’s geometry.
Whenever I write one of these type of articles the comments that follow remind me of the old gentleman that took the time to write me in the mid-1970s. He was quoting from an article written 30 years earlier in the mid-1940s.
Information here is just my opinion, if you read another article with a different point of view, it does not mean I am right and they are wrong, or vice-versa, it is simply two differing opinions. One must weigh the qualifications of the writers, and from the information, the reader forms his own opinion.
The problem is today there is an overload of information, couple this with a lot of poor quality and miss-information, and one often searches until they find an article that aligns with their own established viewpoint. This approach leaves little room for growth, instead of keeping an open mind and leaving room for new ideas.
There were more changes made in the 30 years that were the 60s, 70s, and 80s. than there were in the previous 60 or more years. Changes in actual frame geometry that is. Angles, tube lengths, and fork offset, etc. Closer wheel clearances, shorter wheelbases, and higher bottom brackets too.
Some changes brought about by economic factors, others by framebuilders trying to make something better. It once again made me realize how fortunate I was to have been around in that period. Those times will never happen again. There was so much experimentation going on amongst so many individual craftsmen. There will never be that many individual craftsmen at the same time again.
We have also seen many changes in the last 30 or more years since the end of the 1980s. The whole appearance of the bicycle has changed. We have seen clipless pedals, index shifting, leading to 11 (Or more.) gears. Thread-less headsets. Oversize tubes and carbon fiber have changed to look of the frame, along with sloping top tubes and tee-shirt sizing.
But actual frame geometry has not changed that much, 73/73 angles came out in the 1960s. My road bike fork rake was 35mm. I don’t think other steel framebuilders were too far away from that. Probably around 38mm. was an average. Fork rakes (Offset.) have increased but I feel this has more to do with avoiding toe overlap with the front wheel, than to affect the actual handling. I guess for the time being somewhat of a new norm has been established.