Dave Moulton

Dave's Bike Blog

Award Winning Site

More pictures of my past work can be viewed in the Photo Gallery on the Owner's Registry. A link is in the navigation bar at the top

Bicycle Accident Lawyer


Powered by Squarespace
Search Dave's Bike Blog


 Watch Dave's hilarious Ass Song Video.

Or click here to go direct to YouTube.


A small donation or a purchase from the online store, (See above.) will help towards the upkeep of my blog and registry. No donation is too small.

Thank you.

Join the Registry

If you own a frame or bike built by Dave Moulton, email details to list it on the registry website at www.davemoultonregistry.com

Email (Contact Dave.)

 If you ask me a question in the comments section of old outdated article, you may not get an answer. Unless the article is current I may not even see it. Email me instead. Thanks Dave

Entries in Bicycle Design (46)

Friday
May042007

Trail, fork rake, and a little bit of history

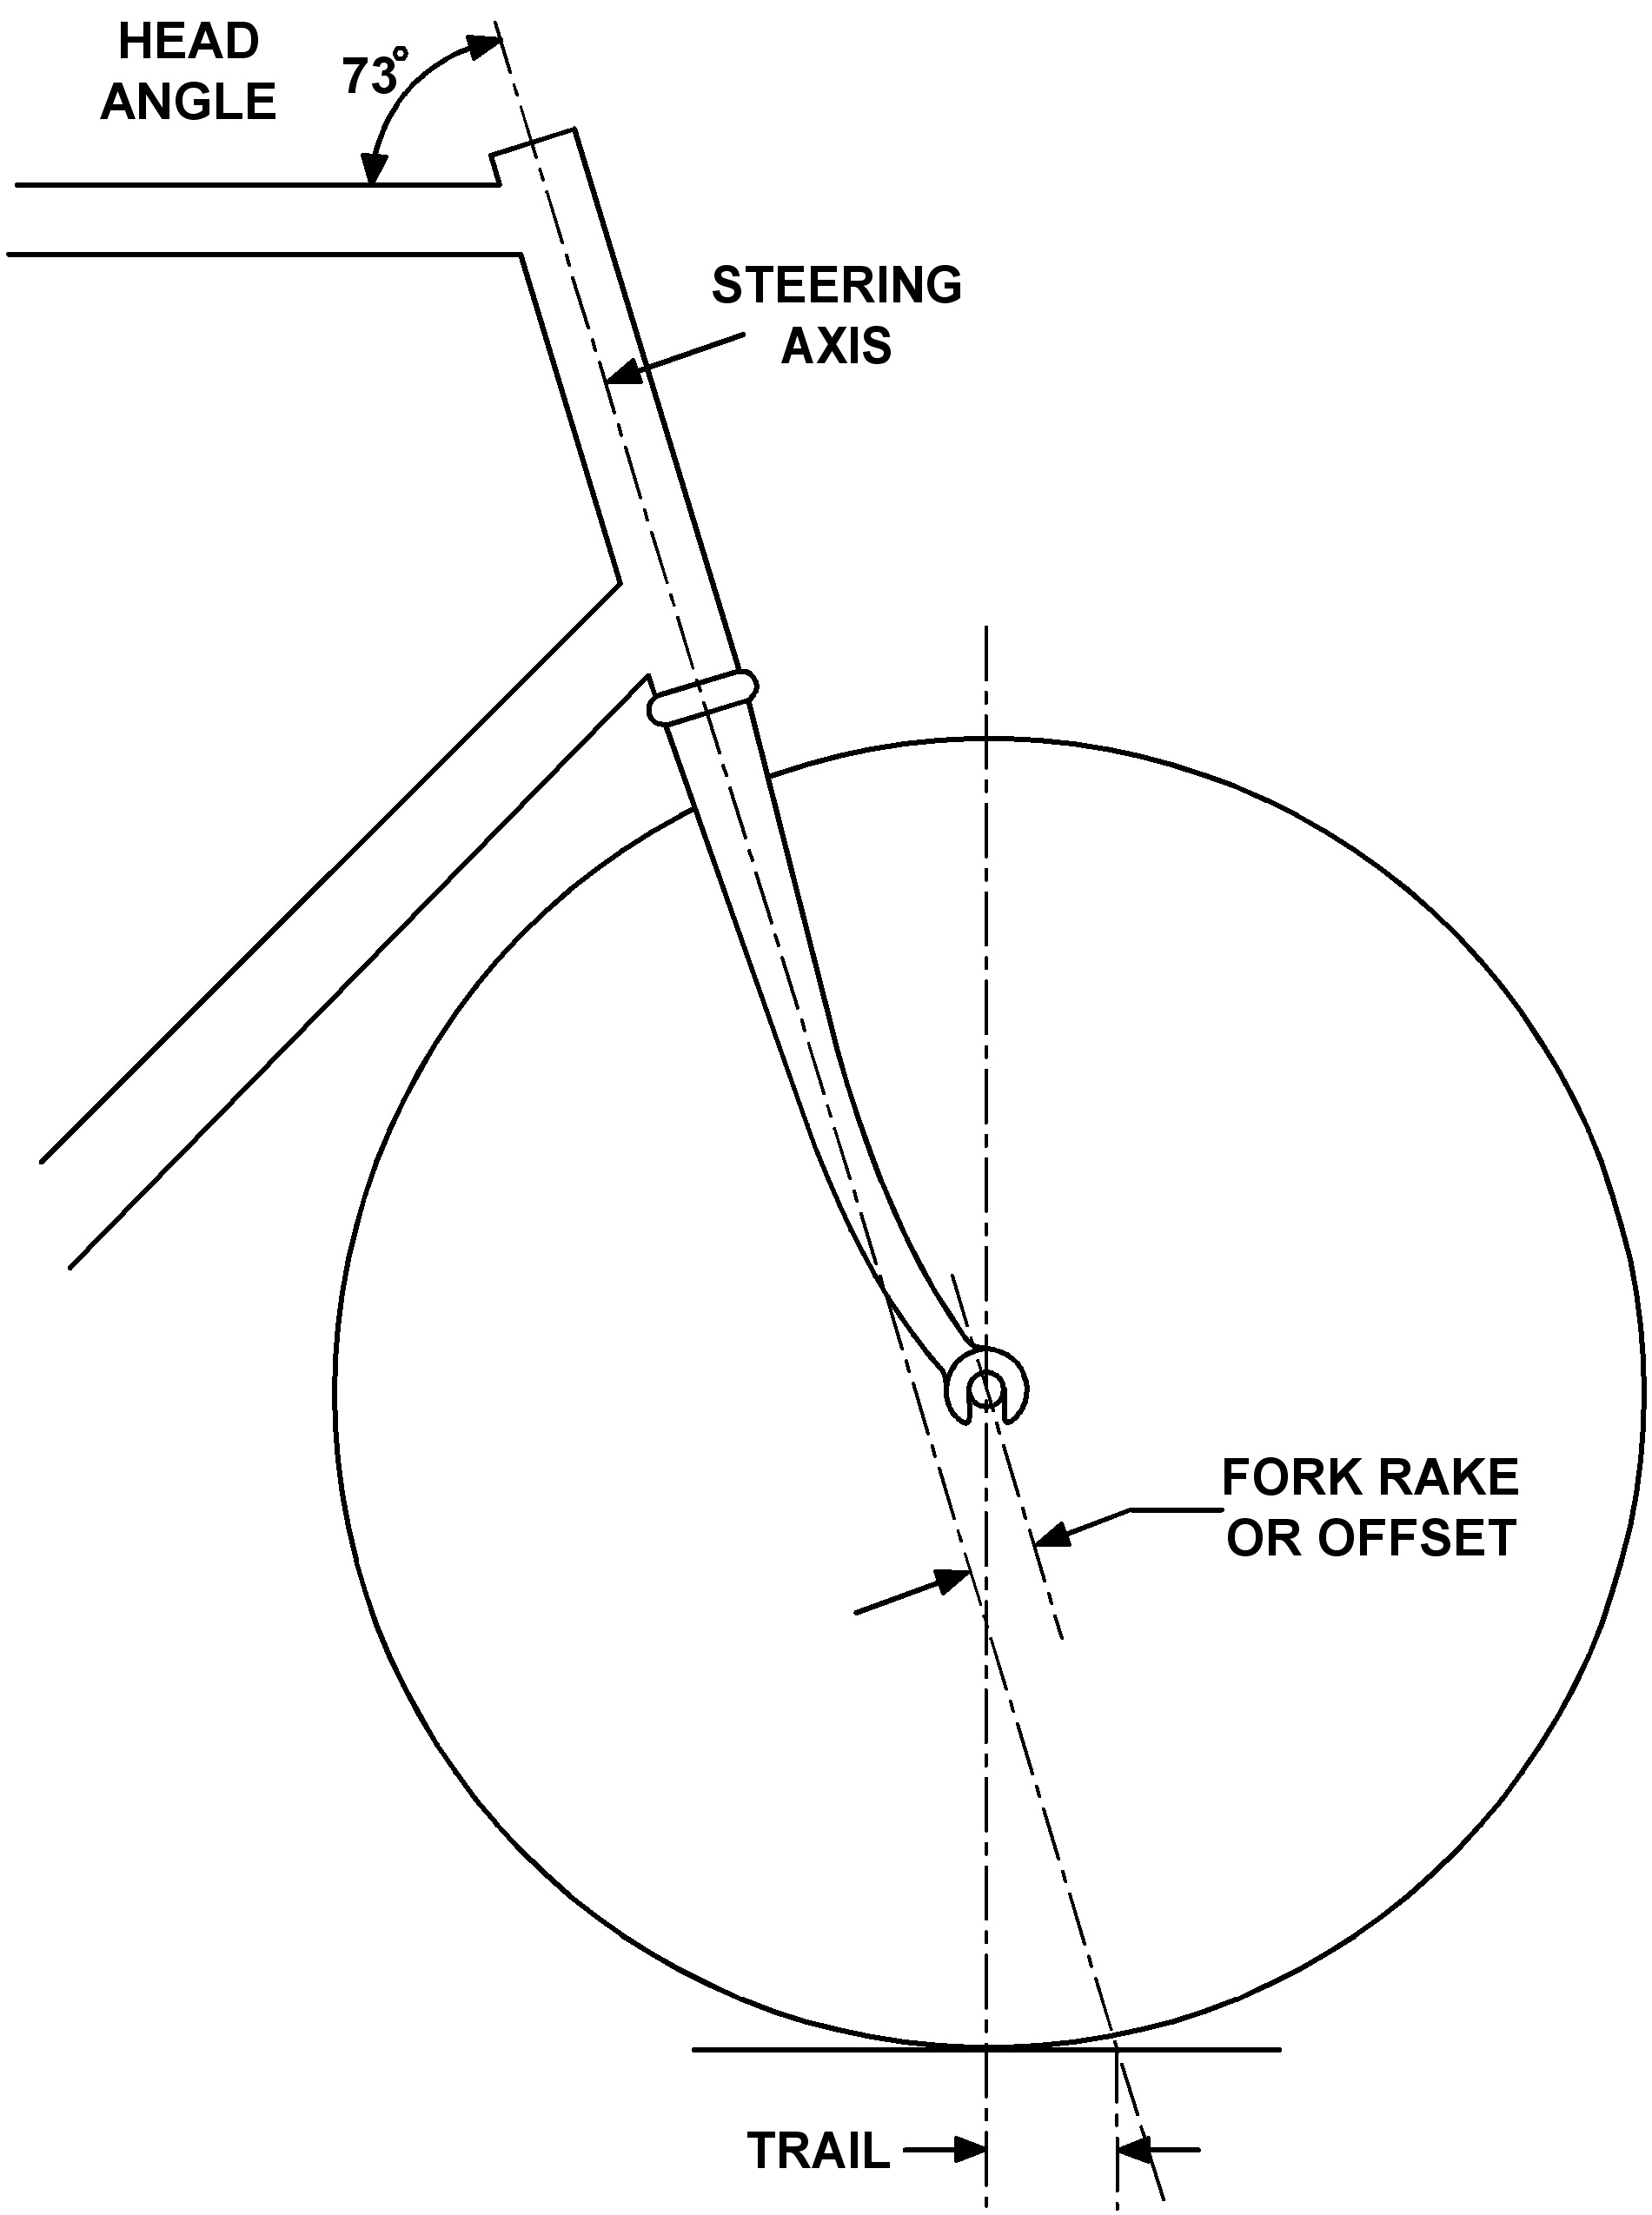
If you draw an imaginary line through the center of your bicycle’s steering tube (Steering Axis.) it will reach the ground at a point in front of where the wheel actually contacts the ground.

The difference between these two points is known as the trail. Trail assists steering; as you lean the bike to the left or right, the steering axis moves in that direction, and thereby turns the wheel in that direction as it pivots on the point of contact with the road.

Trail also assists the bike in holding a straight line. It works on the same principal as a castor wheel on a grocery cart, which goes in the direction it is pushed. (Or in theory it is supposed to.) This is why it is called “trail,” because the wheel trails along behind the steering axis.

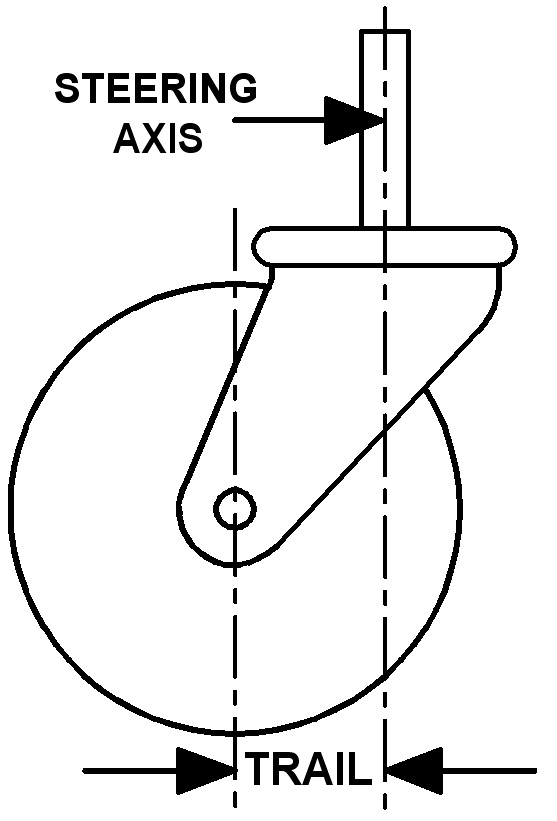
Fork rake or offset is the distance between the steering axis and the wheel center. It doesn’t matter if the fork blade is curved forward in the traditional way, or if the fork blade is straight but angled forward from the crown. If the offset is the same the bike will handle the same.

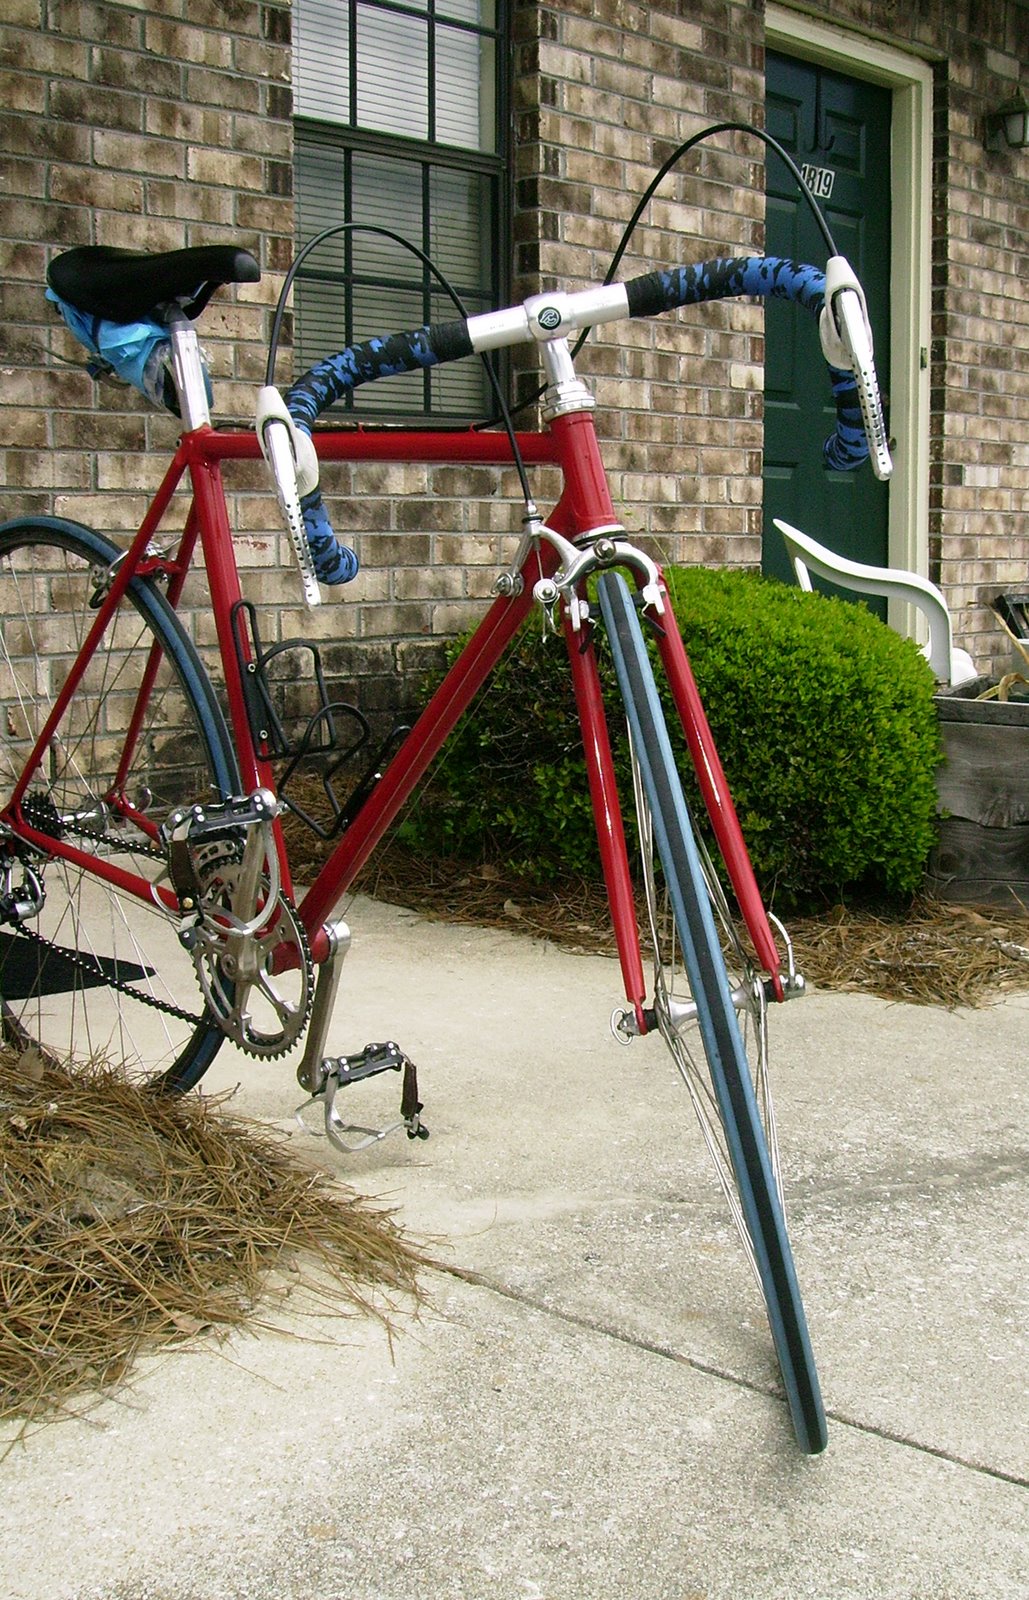
You will see from the drawing above, if the head angle is made steeper then trail decreases because the steering axis moves closer to the wheel’s point of contact. Conversely, a shallow head angle will lengthen trail.

Less fork rake, increases trail, because the wheel center is moved back away from the steering axis. More fork rake means less trail because the wheel center is moved forward.


Bicycles built in the 1930s through the 1950s typically had as much as 3 ½ inches (9cm.) of fork rake resulting in very little trial, often zero. There was a theory at that time that trail made steering heavy and sluggish.

I remember writing an article for Cycling magazine in the 1970s; someone wrote to me saying my theories on trail were wrong, and sent me an early 1950s article from Cycling to prove it.

The old theory was that if you had the front wheel’s point of contact behind the steering axis, when the steering was turned 90 degrees the point of contact was then on the steering axis line. Therefore, the front end of the bike had dropped slightly, and to straighten up again, the steering had to lift the weight of the bike and rider; thus sluggish handling.


While this statement is true, in practice when riding, the front wheel never turns 90 degrees. In fact during normal cornering the front wheel turns very little, making this whole theory about the front of the bike going up and down irrelevant.

I started racing in the early 1950s and I can say from experience the bikes of that era did not handle and corner near as well as today’s designs. These bikes handled reasonably well because frames were built with much longer wheelbases, wheels and tires were heavier, and tires were fatter.

Road conditions at that time, especially in countries like Italy and France were often appalling. The long fork rake and the long wheelbase had a dampening affect on the rough road conditions.

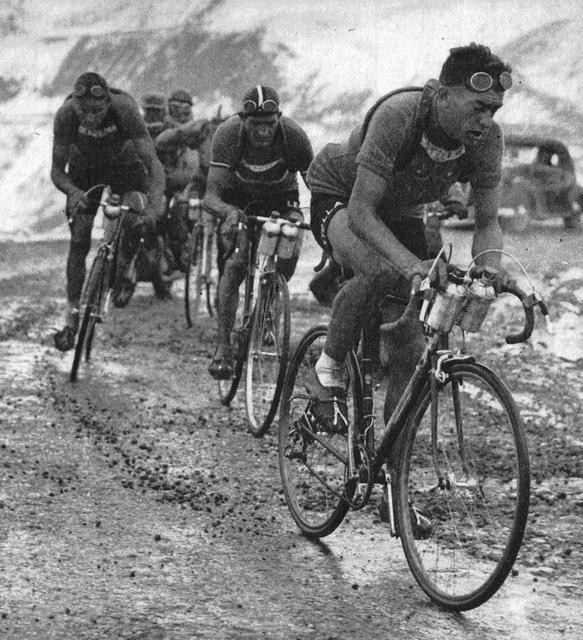
[Typical European road conditions in the 1940s. Louison Bobet leads Gino Bartali (striped cap) and André Brulé in the 1948 Tour de France. Picture from The Wool Jersey.]

As road conditions improved, bikes were built with shorter wheelbases and at the same time tires became much narrower. It eventually became necessary to increase trail to keep the bike going straight.

There was a somewhat chicken and egg situation with regard to shortening wheelbases and adding trail. In my case I shortened the fork rake to shorten the wheelbase and found the resulting increase in trail was an improvement.

Other older established builders, still clinging to the little or no trail theory, shortened the fork rake but at the same time made the head angle steeper to maintain the trail status quo.

This made for some very squirrelly bikes being built in the 1970s, with 75 and 76 degree head angles and front wheels almost touching the down tube. Shorter chainstays to shorten the rear end of the bike were pretty much universally accepted.

A shorter wheelbase means the bike will turn on a tighter radius. Think of a school bus and a compact car, which one will turn tighter? The front wheel turns less on a short wheelbase bike on any given corner; this translates to having to lean less to get around a bend.

I think the big advantage I had was that I was still actively racing and could try out these changes, and experience the difference first hand. Eventually everyone agreed that trail was not a bad thing and head angles became sensible again.

Frames I built had around 2 ½ inches (6.3cm.) of trail. In the early 1970s I did experiment with more trail but found that the bike felt sluggish and had a tendency to wander when climbing or sprinting out of the saddle.

As with any design aspect, more is not necessarily better; for a road bike with a 73 degree head angle the optimum trail seems to be around 2 to 2 ½ inches (5 to 6.3cm.)


Addendum. Nov 15, 2008.

There seems to be some confusion over the term “Fork rake,” which I can understand. The dictionary definition for rake is “The angle of inclination from the vertical.” However, when referring to bicycles, rake and offset are different terms for the same thing. Both are the term for the distance the wheel center is set from the steering axis, regardless of the head angle.


This probably came about because early framebuilders were artisans, not scholars. To add to the confusion, a bicycle head angle is measured from the horizontal, not the vertical. Back in the day when all bicycles had perfectly level top tubes, it was the angle measured from above the top tube to an imaginary extension of the head tube.


Monday
Apr092007

Head Angles and Steering

If the head angle of a bicycle was vertical (90 degrees.) when you turned the handlebars to round a corner, the front and rear hubs would remain in the same plane.

Because the steering tube on a road bike is angled forward, usually at an angle of 73 degrees, when the steering is turned, the fork blade that is on the inside of the turn drops and the other side raises. Therefore the front and rear hubs are not in the same plane.

Going through a turn the front wheel is leaning slightly more than the rear wheel. This adds to the stability of the bike because the front wheel is outside the centerline of the frame.

Because the front wheel is leaning slightly more than the rear wheel, it is turning at a slightly tighter turning radius, creating over steer. This is a good thing; centrifugal forces are pushing the bike wide on the corner, over steer is counteracting this.

Now try this demonstration. Hold your front wheel vertical with both hands while turning the wheel to the left or right. You will notice the bike will lean in the opposite direction to the turn. (Left.)

As stated in the second paragraph above, when the steering is turned, the fork blade on the inside drops. Only this time it cannot drop because you are physically holding the front wheel vertical. Instead of dropping, it pushes the bike in the opposite direction.

You have just demonstrated the action of counter steer. Widely taught and practiced in motorcycle riding, though not as essential in bicycle riding, counter steer can never the less be used very effectively.

Imagine you are riding your bike at speed in a straight line and you want to make a sharp right hand turn. Because you are riding straight the gyroscopic action of the spinning wheels, plus your own weight and momentum, is holding you vertical just as surely as if you were physically holding the front wheel.

When you reach the point where you wish to turn right, nudge your handlebars slightly to the left. (Hence, counter steer.) A good way to do this initially is to push the right side of your bars forward, thus steering left. The slightest touch is all it takes to immediately push the bike over into a right hand lean and the bike steers itself around the corner.

The reason the bike turns to the right the moment it leans to the right is that three different forces come into play.

1.) The law of gyroscopic action states; a spinning wheel will turn in the direction it is leaning. If you roll a coin on a flat surface, it will roll in a circle because it turns in the direction it is falling.

2.) Because the front fork is bent or raked forward, there is more of the wheel ahead of the steering axis than behind it, and its own weight will cause it to turn in the direction it leans. In addition, the weight of the handlebars is in front of the steering axis. You can demonstrate this by leaning a stationary bike, the front wheel will turn in the direction it is leaning

3.) If you draw a line through the steering axis (The center of the head tube.) and extend it to the ground; it will reach the ground at a point slightly ahead of the point where the wheel contacts the ground. This is known as “trail” and gives the steering a caster action that helps keep the bike straight, but also as the bike leans to the right, the head tube and the steering axis move to the right. The front wheel pivoting on its point of contact with the road will therefore turn to the right.

It has been established since at least the 1930s that the ideal head angle for a road bike is 73 degrees. (Give or take a degree either way.) Track bikes designed to be ridden on a banked track or velodrome are a different matter.

The banking of the track counteracts the centrifugal forces of turning. In theory the bike is at 90 degrees to the track surface when traveling at speed, and acts as if the bike were traveling in a straight line with no corners.

The only time a rider needs to deviate from a straight line is to go around an opponent. The rider needs to be able to physically steer around another rider without throwing the bike into a lean to the left or right. Steeper head angles of 75 or 76 degrees achieve this characteristic, along with less fork rake and less trail.

So how will a track bike handle on the street when it is designed for a banked velodrome? Not too badly actually. The steeper head angle is going to make the steering more sensitive, it may call for smooth pedaling to keep the bike going straight.

On the other hand the steeper more sensitive steering needs less trail to keep it straight. It may not corner as well as a bike designed for the road, but as long as a rider is experienced and considers this, there should be no problem.

Wednesday
Feb212007

Bottom Bracket Height

Let me explain the difference between bottom bracket drop, and bottom bracket height. Bottom bracket drop is the measurement from the bicycle’s wheel center, to the center of the bottom bracket. Once a frame is built this measurement is fixed and never varies, therefore it is the most accurate.

However, bottom bracket height is easier to visualize and so is widely used. It is the measurement from the center of the bottom bracket to any level surface that the bicycle is sitting. This measurement can change because fatter tires will raise the bottom bracket height.

On the spec sheet for my Fuso frames, [PDF file.] I listed both bottom bracket height 10 5/8 inches, and 2 ¾ drop. If you add the two measurements together it is 13 3/8 inches, the radius of an average size wheel. (26 ¾ inch dia.)

The argument usually put forward for a low bottom bracket is that it lowers the center of gravity and therefore improves stability. I do not subscribe to this theory because center of gravity is not really an issue on a bicycle, and raising or lowering it has little effect on stability.

On a three or four-wheel vehicle a low center of gravity is important because when cornering at speed the centrifugal forces generated can cause the vehicle to tip over. However, a two wheeled vehicle leans into a corner, and the centrifugal forces actually push the bike down onto the road, which assists traction.

You seldom hear of a bicycle or motorcycle tipping over or falling outwards on a corner; if the rider goes down it is because they leaned too far and the bike slid out from under them. Alternatively, they fell because of road conditions like water, ice or loose gravel, but once again the bike slides out from under the rider, and it is loss of traction not center of gravity that is the issue.

If C of G were an issue, a bicycle would be a lot more difficult to ride; the bicycle can weigh less than twenty pounds and the rider a hundred pounds and above. The center of mass is somewhere in the center of the rider’s body some four feet or more above the ground; proof of this is the racing tricycle. These fascinating machines, rarely seen in the US, are very unstable on corners and it takes a great deal of skill to corner at speed and not tip over.

Picture from the [UK Tricycle Association website.]

This is why I maintain raising or lowering the bottom bracket on a bicycle has little effect on its stability, the center of mass is still very high.

The advantages of a high bottom bracket are obvious on an MTB or a cyclo-cross bike going over rough terrain. Pedal clearance on a road bike when cornering is another, but with clipless pedals this is less of an issue that it was in the 1980s.

The disadvantage of a high bottom bracket is that it makes it difficult to reach the road with your foot when you come to a stop.

Raising the bottom bracket even a little, shortens the chainstays and the down tube on the frame; conversely, lowering it will lengthen them. This is because the wheel center remains constant and so do the rear dropouts. The front fork remains the same, so does the bottom head-lug of the frame.

If these points of the frame remain constant, raising or lowering the bottom bracket shortens or lengthens the lower tubes in the frame, it also raises or lowers the top tube and therefore lengthens or shortens the head tube.

If I raised the bottom bracket on a criterium frame, it was not just to achieve more ground clearance; it was to make a more rigid and responsive frame. The head tube became longer, but as this is the least stressed tube in a frame, it had little affect. On the other hand, the down tube and chainstays are the highest stressed tubes in a frame and shortening these is a definite advantage.

If I lowered the bottom bracket on a touring frame, it was to lengthen the tubes to make a more comfortable ride. It had nothing to do with stability.

With any design aspect it is best not to go to extremes, the 10 5/8 inch (27 cm.) bottom bracket height or 2 ¾ (7 cm.) drop was where I built most of my frames, and is still a good average.

Sunday
Jan072007

Aero Bikes: History


Here’s a little more on the history behind aerodynamic bicycle frames; a subject that I touched on in my previous blog about the US team bikes.

In the mid 1970s there was a craze for drilling holes in components to save weight. Soon no component part of the bicycle was left untouched, with the possible exception of handlebars and stems for obvious reasons; although a few riders with death wish tendencies even tried that.


Steel frames were not immune, with cutouts in the bottom bracket shell and lugs. Towards the end of the 1970s I saw a few British Time Trial Frames with slots cut in the head tube, and matching slots in the steering column inside.

Soon bikes had so many holes in them, they didn’t have a shadow.

Aside from reducing the reliability of the frame or component, people began to point out that any gain in weight saving was offset by the increased air turbulence and the resulting drag of air passing through slots and holes.


People began to think seriously about aerodynamics. At the same time the East Germans were experimenting with aero bikes and helmets; I was one of the first in England to work with the idea in the late 1970s. I made a press tool to form round tubes into an oval shape. I also added an aerofoil behind the head tube and bottom bracket shell.

After the US team bike fiasco I lost interest but I do remember building one at the end of 1980. I had just started work for Masi in Southern California, and they had a sample set of aero tubes. (Japanese I believe.)

I built one Aero Masi frame for the New York Show in February 1981. It was built into a complete bike, light blue in color, and with all the Masi decals it was a very unique and classy looking machine. I wonder where that one is now; definitely one of a kind.


The aero steel frame never really caught on and was only around for about two or three years. The tubes were difficult and therefore expensive to produce. The frame had to be of a lug-less construction, not conducive to mass production. The biggest drawback was the extra weight because the tubes had to be straight gauge. They couldn’t be double butted like round tubes.

Footnote: The pictures are of an English built track pursuit frame built around 1978. Note the extended seat tube, round at the top to accept the seat post. The fork crown was a modified Ron Kitching crown that took the old style narrow Reynolds fork blades, and was hand filed into the aero shape. Also, see details of the aerofoil behind the BB and head tube.

Sunday
Nov052006

Toe Overlap: No Problem


There was a discussion recently on Classic Rendezvous Bike list; the tread titled “Toe overlap even on good bikes,” implied that toe overlap was a design flaw and one should not expect to see this on quality bikes. Toe overlap is a result of other critical design factors and cannot always be avoided especially on smaller frames.

When a framebuilder designs and builds a racing frame, his main criteria are to: (1.) Place the rider in a position where he can pedal with maximum efficiency, and (2.) Design the frame so the finished bike will handle at speed in the best way possible. If the result of the design is toe overlap then the builder can do little because to achieve toe clearance other aspects of the frame’s design would have to be altered.

For example the picture above shows my own bike. It has a small 52 cm. (C to T) frame and has about an inch of toe overlap. If I were to make the front end of the bike one inch longer to avoid toe overlap, I would have to do one of the four following things or a combination of all four.

(1.) I could make the seat angle steeper, or (2.) the top tube longer. (3.) I could make the head angle shallower, or (4.) the fork rake (offset) longer. The first two would effect my riding position; the last two would affect the handling of the bike.

Toe overlap is not a problem because riding and cornering at normal speed the front wheel never turns far enough for the toe to hit the front wheel. The only time it becomes an issue is when turning sharply at a very slow speed; doing a U-turn on a very narrow road for example.

Caution and common sense are all that is required when executing a tight U-turn. If you are turning left then your right pedal will be down for maximum ground clearance as you coast into the turn. By the time you need to start pedaling again you are already half way through the turn, and the right crank has to complete ¾ of a turn before the toe is opposite the front wheel.

By that time, you should be all the way around and the front wheel is straight ahead again. If you are not the coast again, or ratchet the crank back again on the freewheel.

Doing the same maneuver with a fixed gear is a little trickier; but it is a matter of timing. Go very slow and start to turn as the toe passes the front wheel; that way the crank has a whole revolution to go before it makes contact again. If the front wheel is still turned the next time round; straighten the front wheel so the toe clears, then turn sharply after it has passed.

Fixed gear and fenders (Mudguards.) is going to make this move a little difficult, but not impossible. With clipless pedals, you could unclip the outside foot and move your toe back to give more clearance. I sometimes get out of the saddle and simply point my toe downwards to give more clearance.

What you need to avoid is a situation where you get your toe on the wrong side of the wheel in a turn; if you do, try not to panic. Ratchet the crank back if you have a freewheel, or if you are riding fixed gear, keep going and let the toe pass the front wheel so you can straighten up again.

Lastly, I would like to point out that a racing motorcycle with narrow swept down handlebars; turning is restricted because the handlebars touch the fuel tank. Here is a machine that will go 200 mph plus, and restricted turning seems not to be a problem. Therefore, I maintain the opinion that toe overlap on a bicycle is neither a design fault nor a problem.