Dave Moulton

Dave's Bike Blog

Award Winning Site

More pictures of my past work can be viewed in the Photo Gallery on the Owner's Registry. A link is in the navigation bar at the top

Bicycle Accident Lawyer


Powered by Squarespace
Search Dave's Bike Blog


 Watch Dave's hilarious Ass Song Video.

Or click here to go direct to YouTube.


A small donation or a purchase from the online store, (See above.) will help towards the upkeep of my blog and registry. No donation is too small.

Thank you.

Join the Registry

If you own a frame or bike built by Dave Moulton, email details to list it on the registry website at www.davemoultonregistry.com

Email (Contact Dave.)

 If you ask me a question in the comments section of old outdated article, you may not get an answer. Unless the article is current I may not even see it. Email me instead. Thanks Dave

Entries in Bike Fit (19)

Tuesday
Oct272015

Saddle too low?

If I see someone riding with their knees splayed outward it is often a good indication that their saddle is too low.

It may also be the rider is overweight and has a large belly to contend with, but not always.

Stand with your back to the wall and raise one knee forward and upwards towards your chest.

There is a limit to how high your thigh can go. Once that point is reached, the only way you can make your knee go higher is to move your knee outward and then it can travel an inch or two higher.

Squat with your knees together and you can’t go as low as you can with your knees spread apart. In non-medical terms, it is the limit of travel of the ball at the end of your thigh bone in its socket in the pelvis that restricts your movement beyond a certain point.

It amuses me to see riders with aero bars in a low horizontal tuck position, riding with knees splayed outwards. Any aerodynamic advantage they gain by the low tuck position is lost because the outward knees has increased their frontal area by 20% or more. Not only that, but the outward spread thighs is like an open ended “V” catching air as they travel forward.

In order to achieve a low horizontal position, one must be flexible enough that the pelvis remains near vertical and the back bone or spine bends forward. Three things affect the angle of the thigh bone in relation to the pelvis. The saddle too low, the saddle too far back, and the back too low, but only if it causes the pelvis to rotate forward.

It is rarely I see someone with their saddle too high. One can feel that they are stretching at the bottom of the pedal stroke, or they are rocking side to side on the saddle as they pedal. But a saddle too low may feel fine, but it is not necessarily the most efficient riding position.

If your knees are splaying outwards it should be easy to spot, just look down. Knees should pump straight up and down like two pistons, and should pass an inch or so either side of the top tube. If you suspect your saddle is too low, it rarely does any harm to raise it. Put a piece of masking tape around the seat post to mark the original position. Raise it by a small amount 1/8 in, or 1/4 in. Maximum. (3 mm. to 6mm.)

Ride for a week or so, then possibly you can go up a little more until you find the sweet spot. Saddle height is not a fixed thing. As you lose weight and muscles stretch a saddle needs to be raised. The questions you need to ask yourself after raising the saddle is, does it feel better, do I feel stronger, and am I going faster.

To reiterate, few ride with a saddle to high, but many ride with their saddle too low, because it feels fine. Unless you try raising it a little you will never find out. I feel any person’s ideal saddle height is the point where the saddle is almost too high, then down a tad from there.

The leg needs to reach its full extension at the bottom of the pedal stroke, without stretching to reach that point, in other words the power is on right to the end of the pedal stroke, and definitely not reach its upper limit at the top of the stroke.

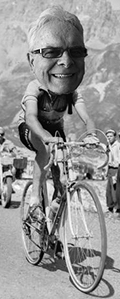
Footnote: I couldn’t find a better picture to illustrate this piece, except the exaggerated one at the top. But it did lead me to realize how BMX riders manage to pedal straight with their saddle so low. The saddle nose is positioned up which causes the pelvis to lean back thus increasing the angle in relation to the thigh. I'm not suggesting you try this on your road bike.


 To Share click "Share Article" below 


Wednesday
Jan072015

Designing Bikes for Women

I have this theory regarding functional art, that if an object or piece of equipment is designed to perform its function correctly, it will appear pleasing to the eye from an aesthetic point of view. A piece of furniture like a chair, a bridge, a boat, or indeed a bicycle, all fall into this category of functional art.

Not only does the bicycle need to look right standing alone, but rider and bicycle need to look right together. The bicycle becomes an extension of the rider, a platform if you will for the athlete to launch a physical effort.

As a result of my last article, a story of the above track bike, the bike’s former owner, Maggie Thompson, formally Margaret Gordon Smith, commented on the piece, and sent me the above picture, of her actually racing on the track in the British National Women’s Pursuit Championships.

Rarely do I get to see a perfect side on photo of a rider and bike, where the rider is at maximum speed and one can see how well rider and bike fit together. For those who don’t know what Pursuit Racing is about? Two riders start on opposite sides of a banked track or Velodrome, and they chase each other. Hence the name Pursuit.

It is a race of truth, like a time trial, there is no pacing. The winner is the rider ahead at the end of a set distance. The women’s pursuit is 3,000 meters, which is 3 kilometers, or 1.863 miles. Not a huge distance, but one starts out about half a lap out of the saddle to reach maximum speed, then sit down and try to maintain that speed to the end. It is a race that will leave you gasping for breath for an agonizing 4 minutes.

Maggie describing this bike said, “I found I could breath.” That was because the rule of frame design back in the mid-1970s and before, was a 73 degree seat angle for everyone no matter how tall or how short. Maggie is slightly over 5’ 3” tall, which is not unusual. Many women are in the 5 foot to 5 foot 4 inch range.

This frame had a 77 degree seat angle which was unheard of at the time. But while 73 degrees is fine for a tall person with long legs, for the shorter rider it means the thighs are pressing tight into the upper torso thus restricting breathing. Of course it is essential the back be horizontal for maximum aerodynamic efficiency, and the steeper seat angle cuts down the angle of torso bent at the pelvis. It also allows for a shorter top tube meaning the rider is not stretched out, and the arms are working in opposition the legs.

Right: Maggie on her road bike I also bult for her. This frame had a 76 degree seat angle.

When it comes to designing and building bikes for women, it is not that women are drastically different proportionally than men, it is that they are generally a lot smaller.

It is a myth that all women have longer legs and shorter bodies.

Women come in all shapes and sizes the same as men, long legs short torso, short legs long torso.

The main difference being, shorter overall height and much smaller feet than men.

The length of the foot comes into play because when pedaling the toe is pointing down at the bottom of the pedal stroke, so the foot becomes an extension of the leg. A man and a woman of the same height and leg length could both use an identical frame, but the female rider would have her saddle set lower because of her smaller feet.

The problem frame designers and builders have always faced when it comes to building bikes for women, is in making bikes small enough. There is a limitation caused by the wheel size. In the last 60 or more years I have been involved with racing bikes, (And before.) they have had 27 inch wheels, the wheel diameter to the outside of the tire is 27 inch diameter, or slightly less depending on the tire cross section.

700C wheels are the same, 27 inch diameter or slightly less. I always thought the “C” was for Clincher, but I have noticed tubular tires are now also called 700C. A front fork has fork blades that are the same length no matter how large or small a frame is, because the front wheel is the same 27 inch diameter for all sizes.

Throughout the range of frame sizes, the fork crown stays in the same place. So does the bottom headset bearing, and in the days of lugged steel frames the bottom head lug was always in a constant position.

Everything above this point varies with the frame size. The length of the fork steering tube, the frame head tube, the top tube is higher, etc., etc. In the days when top tubes were always level, the framebuilder could only lower the top tube until the top head lug met the bottom head lug.

Metal could be removed from the top and bottom lugs but for all practical purposes the smallest frame one could build with a level top tube was 48 cm. (19 in. C to T) with a standard bottom bracket height. After that one could raise the bottom bracket to make the seat tube shorter, but the last thing a rider with short legs needs is to be higher from the ground.

Incidentally in the top picture, Maggie’s track frame is 19” but the head lugs are not touching. That is because track bikes have a higher bottom bracket to clear the angle of the track banking. Also the steeper than normal seat tube pushed the seat lug higher, and therefore the top tube.

Today’s frame design with the sloping top tube does make it possible to make much shorter seat tubes. However, the front end stays exactly where it has always been, because the front wheel is still the same diameter. The good news is, shorter riders do not need a huge difference in saddle to handlebar height. See how little difference there is in the top picture of Maggie on her bike.

My advice to a female cyclist who wishes to engage in serious competition. If you are 5’ 6” in height, or taller you can ride a men’s frame, bearing in mind what I said earlier about your saddle being lower because of your smaller feet. If you are shorter than 5‘ 6” and especially if you are in the 5 foot to 5’ 4” height range, get the smallest frame with the shortest top tube you can.

There are frames out there that are advertised as being Female Specific. These have a longer head tube resulting in a higher front end. There is less drop down from the saddle to the top of the handlebars, making for a more relaxed position. These are great if you just want to ride for exercise or engage in ultra-long distance rides. There are similar frames for men with names like “Endurance.”

Whether male or female, choose a bike or frame that suits your purpose. If you want to race seriously get a race bike and set it up in an efficient aerodynamic position. If your goal is exercise and more leisurely riding, don’t buy a race frame, buy one of the bikes offered for that purpose.


 To Share click "Share Article" below

Wednesday
Sep252013

Finding a virtual frame size

No more than 20 years ago racing frames were lugged steel, built by craftsmen. Many aspects of design like the diameter of the tubes for example had not changed for 100 years. Frames were built in one centimeter increments so there were as many as 18 different size frames to cover the complete range of different size people.

Top tubes on road bicycle frames were horizontal and exactly level. This gave a point of reference, and once a rider had determined his correct size frame, for the rest of his life he could then buy any brand of frame in his particular size, and it would fit.

No one ever talked about handlebar drop, (The distance from the top of the saddle to the top of the handlebars.) because if a person had the correct size frame and the saddle was set for their particular setting, then the height of the handlebars above the frame was automatically correct. It was limited by the amount of adjustment in the old quill stems. About 1 1/2 inches. (37mm.)

In the mid 1990s this changed mainly due to the influence of mountain bike design and road bike frames are now labeled “Compact,” which means they come in fewer sizes, and the greater differences between small, medium, and large are taken up by longer seat posts, and a variety of handlebar stems that come in different lengths and angles.

Choosing a frame size is the easy part because there are fewer sizes, but where do the handlebars and saddle go in relation to everything else? One answer is to find your virtual frame size and create an imaginary horizontal line that becomes a reference point, and the handlebars are then set a certain distance from that reference point.

Different manufacturers’ sizes will vary slightly, and once a person has decided on a particular brand, they should go by that companies recommended size. Generally speaking an XS frame will fit a person 5’0” to 5’4” tall. Small frame 5’3’’ to 5’7” tall. Medium frame 5’6” to 5’11” tall. Large frame 5’10” to 6’3” tall. And a XL frame 6’2” to 6’5” tall.

There is some overlap in sizes, notice that a person 5’10” tall could use either a medium or large frame. This person should choose the smaller medium size for racing, or the large for more leisurely riding. The larger frame will have a longer head tube, making the handlebars higher in relation to the saddle height.

For some time now people have been asking where they can find my frame sizing chart that used to be on my old website. I have posted a printable version as a PDF, you can find it here. Instructions are on the sheet, your virtual frame size will be in the “Center to Top” column, as it represents the top side the top tube on an of the old school level top tube frame.

For example, if the virtual frame size is 61cm. measure that distance from the center of the bottom bracket, and mark the seat post at that point with a piece of masking tape. The top of the handle bars should be between 9 and 12.5cm above the horizontal virtual line. An easy way to check this, on a level floor, measure vertically down to the floor from the piece of tape. Add the 9 to 12.5 cm then measure up from the floor to the top of the bars. 

The chart was originally intended for a racing set up, and one thing to keep in mind is that modern handlebars are flat on top and the brake lever hoods are higher. There is an article here on saddle height, that some have found useful.

The frame size chart also has top tube length and stem length. If you take these from the same line as your virtual frame size, and add the two together, you will have the recommended distance from the center of the seat post to the center of the handlebars. Measured horizontally across. (You can ignore the 1/2 centimeters.)

No frame sizing method or chart is written in stone, it is intended as a guide to give a person a place to start from. There will probably need to be some fine tuning to arrive at the perfect position. However, for someone starting out, if you know your virtual size before you buy a bike, you will be more informed and have an idea if the bike you are considering is at least close to the right size.


  To Share click "Share Article" below

Monday
Mar122012

Frame Design: Then and Now

The above picture is me riding in the British National 12 Hour TT Championship in 1953; dating the picture is the spare tubular tire worn around my shoulders as the pros did in that era.

My bike frame size back then was 22 inch; (56cm.) compare that to the 51cm. I rode at the end of my racing career in the early 1980s, and still ride today. That is a whapping 5cm or 2 inches smaller.

If I rode a 56cm. frame today it would way too big for me, and yet looking at the above picture my bike looks fine and not too large at all. So what happened; did I shrink over the years? I was certainly a lot slimmer back in my youth, but my legs are pretty much the same length as they are now.

A clue is in the amount of seat post showing; about 2.5 inches (6.3cm.) in the above picture; I have 4.5 inches (11.4cm.) on my current bike. This accounts for the 2 inch (50cm.) difference in frame size.

The reason my 1953 bike does not appear too big for me is because it wasn’t; it was a totally different design than today’s frame. My bottom bracket height was only 9.25 inches; (23.5cm.) today’s bike has a BB height of 10.625 inches (27cm.)

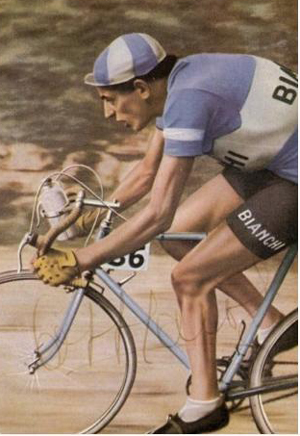
I would also point out that all racing cyclists in the 1950s, including the pros, pedaled much lower gears, sat more upright, and rode with their saddles set lower by today’s standard.

See picture of Fausto Coppi on right.

I can remember that my bottom bracket was low enough that I could lower my heel and actually touch the ground.

Our cycling shoes had real leather soles, and had steel tips on the heels to prevent wear when walking.

While out training after dark, and coasting down hill; we would sometimes lower our heel so the steel tip made contact with the road, sending out a shower of sparks. A pretty spectacular visual effect, especially if several riders did it together.

When you lower the bottom bracket on a frame you also lower everything above it, the top tube and the height of the saddle from the ground. You do not necessarily lower the saddle in relation to the pedals. That will be whatever the rider sets it at.

However, the handlebars are not lowered by as much. The reason being that the size of the front wheel and therefore the length of the front fork are constant no matter what frame size. Above the front fork there is a head tube and head bearings. 

It would be impossible to build a 51cm. frame with a nine and a quarter inch BB height, because with a level top tube there would be no room for a head tube; which is why I rode a much larger frame back then. Or not so much a larger frame, but one with a lower BB and a longer seat tube.

Over the years the bottom bracket height on racing frames has increased; not because striking a pedal on the ground was an issue. (I never found it to be a problem.) But rather one of making the BB higher makes the chainstays and down tube shorter, and therefore makes a stiffer frame.

Also probably the main factor driving frame design is the change in riding positions of today’s racing cyclists, over those of their predecessors in the 1950s. I have already mentioned the 50s riders sat more upright because the handlebars were higher in relation to the saddle.

Today’s racing bicycle has a large saddle to handlebar height difference; which is how most racing frames sold today are designed. However, the majority of the frames are bought by non raciing leisure riders; using them purely for exercise and pleasure riding. Many of them like myself are older, and are not flexible enough to get down in those horizontal, low tuck racing positions.

Today’s frame design with its sloping top tube does not restrict a frame designer/builder like the level top tube did. No matter what the BB height and seat tube length, the head tube can be any length. So anyone having a frame built for leisure riding by an independent builder might consider lowering the BB height.

I did this when drawing up the specs for my New Fuso that Russ Denny is building for me. This is probably the last frame I will ever need. I designed it with an 8.5cm. drop; which is a 10 inch. (25.3cm.) BB height.  (Drawing below.)

This does two things; by sitting closer to the ground it will be easier to put my foot down when stopping. But more importantly, a lower bottom bracket means the saddle is lower in relation to both the ground and the handlebars.

Not the other way round of having the seat high to begin with, then raising the handlebars to achieve the desired position.

I have come to realize, the racing position of the 1950s is probably the ideal leisure riding position for today. I will have my frame built lug-less; (Welded.) this means there is no restriction on angles, and because the modern design has a sloping top tube it is no longer necessary that I go to a larger frame.


Thursday
Nov182010

Building small frames

Frame design, in many ways, was much simpler when I was building back in the 1980s.

Top tubes were always level; it was not acceptable, to me or my customers, to build a frame with a sloping top tube.

Once a rider had established his correct frame size, he set the handlebar stem about 4 or 5 centimeters above the head bearings.

Then he set his saddle to the correct height and he was for the most part, good to go.

The handlebar stem could be adjusted a centimeter up or down as the rider wished.

The other point that made everything simpler was the fact that a person could go buy a frame of any make, in the same size, and the seat to handlebar height ratio would be the same.

If the top tube length varied slightly it could be corrected with a longer or shorter stem. Handlebar drop never even entered into the equation because it was automatic once you had the frame size right. The level top tube was in fact a point of reference.

Many years before I started riding, the wheel size for a racing bicycle was set at 27 inches diameter, or 700c as it is known today. This means that there is a fixed distance from the ground to the bottom of the head tube. This is always the same for any size frame with 700c wheels.

On a level top tube frame, it doesn’t matter that the builder changes the bottom bracket height. If he raises it, and the seat tube length remains the same, then he also raises the top tube and the head tube becomes longer. This is because the bottom of the head tube remains in a fixed position.

The rider’s saddle height is measured from the pedals (Or BB center.) to the top of the saddle. So although the rider is sitting higher because of the high bottom bracket, because the head tube has become longer by an equal amount, the seat to handlebar height difference always remains the same for any given size.

Each frame size will have its own saddle to handlebar height difference, which increases as frames become larger, decreases for the smaller sizes. On a modern sloping top tube frame, raising or lowering the bottom braket height will not necesarily alter the head tube length.

With today’s design, the bottom of the head tube is still in a fixed position, but the top of the head tube can be anywhere; it is not governed by a level top tube as it used to be. There seems to be no standard point of reference between the different manufacturers.

Where today’s design has an advantage it is in building very small frames. The bike pictured top left, is my personal bike; it is a 51 centimeter. (Center to top.) You can see in the picture that if the position of the bottom head lug is fixed, a framebuilder can only lower the top tube another 2 cm. and the lugs merge. To all practical purposes a 49 cm. is the smallest level top tube frame he can build.

The only way to go smaller is to shorten the seat tube by raising the bottom bracket. This really goes against the requirements of the rider, because the last thing a person with short legs needs is to be higher from the ground.

I was asked just this week how would I go about designing frames for women. If the woman was 5’ 4” or taller it was no problem; I would just build according to the customers measurements as I would for a man.

If the woman was less than 5’ 4” then it was not so much a case of building a frame to fit, but one of how small can I build this frame? There is not only a limit to how short can I make the seat tube, but there is a limit the how short one can make a top tube.

The whole problem is fitting two large wheels into a frame that has reached the limit for those size wheels; it restricts what you can do. Smaller wheels are available but rims and tires are limited to a much narrower choice than for the standard 700c.

Frames are now sized like tee-shirts; extra-small, small, medium, and large. My advice to female under 5’ 4” would be to buy a frame in the smallest size possible. There will be no problem with the seat tube length, and there is now a far wider range of handlebar stem lengths and angles than were ever available in my day.

With this wider range of handlebar stems, it should be possible for most riders to dial in a near perfect position. The only problem as I see it is that another dimension has been added to the equation, and that is handlebar drop.

In the old days one only had to concern themselves with saddle height and reach, drop took care of itself with the correct size frame.

I always maintained that a rider’s arms (On the drops.) should be in direct opposition to the legs. Choose a combination of drop and reach that will achieve this. 

Back in 2007 I wrote an article which included a chart that gave a drop measurement and was based on my old fit philosophy from the days when top tubes were level. Some people have found it useful.

Your comments and input as always are appreciated.