Dave Moulton

Dave's Bike Blog

Award Winning Site

More pictures of my past work can be viewed in the Photo Gallery on the Owner's Registry. A link is in the navigation bar at the top

Bicycle Accident Lawyer


Powered by Squarespace
Search Dave's Bike Blog


 Watch Dave's hilarious Ass Song Video.

Or click here to go direct to YouTube.


A small donation or a purchase from the online store, (See above.) will help towards the upkeep of my blog and registry. No donation is too small.

Thank you.

Join the Registry

If you own a frame or bike built by Dave Moulton, email details to list it on the registry website at www.davemoultonregistry.com

Email (Contact Dave.)

 If you ask me a question in the comments section of old outdated article, you may not get an answer. Unless the article is current I may not even see it. Email me instead. Thanks Dave

Entries by Dave Moulton (1115)

Tuesday
Mar212006

A Paris Sport frame has surfaced

I was recently sent these pictures and asked if I could identify this frame, the person who sent the photos said he had bought the frame in the Spring of 2005 and the seller told him the frame had been built at Paris Sport in New Jersey about the time I was there, which was January 1979 to October 1980.

I was able to tell him that I did recognize my own work and that I did indeed build this frame. Points of recognition are: The seatstay caps:


Compare this to this later frame built in California in 1983


The rear drop outs. This was how I finished them at that time


Compare these to this English built frame from 1975


Later after working for Masi I decided the way they finished their drop outs was a more aesthetically pleasing style so all frames built after 1980 were finished like this one.


This fork crown on the Paris Sport frame was forged (Hot stamped from a steel blank, not cast.) and somewhat unique in that I brazed a washer over the brake hole so the brake would have a flat surface to seat on.


The Prugnat lugs and the top tube cable guides I remember using these. Lastly the little round stop under the down tube to prevent the gear lever clamp from sliding down the tube. I went to a factory in England where they did metal stamping and collected a number of 3/16 in. diameter blanks that were left over from stamping holes in sheet metal. They made perfect clamp stops and I brought a number with me when I came to the US.


The frames I built at Paris Sport did not have my name on them. They either had the Paris Sport name or they were sold like this one with no decals or frame number. It is quite rare for one of these to surface and as they had no markings I'm sure a few are laying around unidentified.


Friday
Mar102006

History Lesson


1968 Pugliaghi. Everything clamp on even the bottom bracket gear cable guides. Pictures from TheRacingBicycle.com

In the late 1950s through the early 1970s there was a slump in bicycle sales in Europe. In the 1960s the economy was booming and although in many places the bicycle had always been the mode of transport for the working classes; many were now buying cars for the first time. At the same time the fitness craze had not yet begun; that started in the 1970s.

Racing bicycles and framebuilders were also hit by this slump and the price of a frame rose very little in that decade even though inflation did. Framebuilders had to look for ways to cut costs and one of them was to leave off all braze-ons. Building a frame without braze-ons does save a considerable amount of time and therefore labor costs. The only braze-ons seen in this era was a chainstay stop and sometimes a little stop under the down tube to prevent the gear lever clamp from sliding down the tube.

Having done that framebuilders could not tell their customers they were doing this to cut costs, hence the story that braze-ons weaken the frame. I think Cinelli started it; framebuilding was never their main source of income (Handlebar stems was.) so the price of a Cinelli frame was always high. So everyone’s thinking was if Cinelli can get away with it so can we, and they followed suit.

Do braze-ons weaken the frame? Maybe very marginally but then so does brazing the lugged joints; it is part of the framebuilding process. I have seen down tubes break right at the clamp on gear lever. Clamps require more maintenance they collect moisture under them and if they are over tightened they can dig into the tube and start a stress riser. But I feel if anyone is restoring a bike from this era they should keep the cable clamps they are authentic for the period.


Monday
Feb272006

A Different Thought on Frame Sizing


After measuring and studying hundreds if not thousands of customer’s measurements over the years as a custom frame builder. I came to the conclusion that although human bodies are all different; they do follow certain rules of nature.

Choosing frame size on inseam alone does not work across the board because for example it is common for a 6 foot man to have an inseam as short as 30 inches; and you can’t put a 6 foot man on a 51 cm. frame which is what his inseam suggests.

Tall people are not scaled up models of short people. Most of the height difference is in the legs; body length differs by a lesser proportion. If you have long legs then you also have long arms. Short legs; short arms. This makes sense since most animals are four legged; why should we be any different?

Leg length is a combination of the inside leg measurement plus the length of the foot. Length of the foot is important because when pedaling the toe is pointed downward at the bottom of the pedal stroke; so the foot becomes an extension of the leg.

People, who have a short inside leg measurement for their height, generally have longer feet. (Bigger shoe size.) It is as if they were designed as a much taller person, but their heel got turned further up their leg; making a short leg, long foot.

Imagine two people both six feet tall standing side by side; one has a 34 inch inside leg, the other a 32 inch leg measurement. Because they are the same height it follows the one with the shorter leg has a body 2 inches longer; he also has longer feet and shorter arms than the other guy. They can both fit on the same size frame, (59 cm. center to top i.e. 57 center to center.)

They will both have close to the same seat height, because the short leg guy has a longer foot so his seat needs to go higher than his inseam would suggest. They can also use the same top tube length and handlebar stem, because one has short body long arms; the other long body, short arms; making their reach the same. Minor adjustments in seat height and stem length may be called for.

It has occurred to me that with these compact frames on the market now and only available in small, medium, and large; customers are only ball parking frame size anyway. It has long been my opinion that frame size is linked to the overall height of the rider more than any other measurement because of the rules of nature I have just spoken of.

I have formulated this based on my own frame sizing chart. If you are 5’ 3” to 5’ 5” frame size equals Height divide by 3.3. For people 5’ 6” to 5’ 10” frame size = Height divide by 3.2 and if you are 5’ 11” to 6’ 4” frame size = Height divide by 3.1

A example would be someone 6’ 2” = 74” divide this by 3.1 = 23.87 in. (61 cm. measured center to top. i.e. 59cm. center to center. A person 5’ 7” = 67” divide this by 3.2 = 20.93 in. (53cm. center to top. i.e. 51cm. center to center.) The easiest way to convert from inches to centimeters is to get a tape measure with both metric and inches on and simply read across. If you don’t have a tape measure the formula is “inches x 2.54”

Reach which is top tube plus stem length; is frame size center to top plus 10cm. If you want something more accurate go to the chart on my website The chart was derived not by any mathematical formula but by records of custom frames built over many years. Most people find it pretty accurate. What I have put forward here in this Blog is an attempt to come up with a simple formula that comes close to this. If you are an experienced rider don’t change your position based on this alone because this is new thinking. It is intended as a place to start for a newcomer to the sport.

Feedback would be apprecated.

Sunday
Feb122006

My best 12 hour ride.


The picture here shows me aged seventeen competing in my native England in the National 12 Hour Time Trial Championship. I remember that I was the first rider off at 5:01 a.m. on a Sunday morning in August 1953 and I rode non-stop until precisely 5:01 p.m. that evening when a time keeper who had followed me for the last few miles told me to stop. The whole course was measured precisely and for the last part of the event riders were directed onto a fifteen mile “finishing circuit” until their time ran out.

The mileage was marked on the finishing circuit at every quarter of a mile. From the point where my time ran out the time keeper went back to the nearest marker and on a fixed wheel bicycle counted pedal revolutions to the point where I had stopped. Using this method each rider had the distance covered measured to the nearest yard. I covered just over 220 miles my best ride for this event and one that I never bettered in later years. The winning ride that day was around 250 miles.

After I set out that morning other riders followed at one minute intervals; 120 in all over a two hour period. It was a perfect day as I remember, overcast but not cold and little or no wind. The course was on the famous Great North Road where time trials had been held since they started in the late 1800s. The Great North Road or “The A1” as it is designated was the main arterial road from London to Scotland at the time. The first freeway or Motorway as they are called in England was not built until 1959.

The course started at Girtford Bridge about 40 miles north of London and went as far north as Grantham in Lincolnshire. The course was laid out like a giant tree with the A1 being the main trunk running south to north and along the way we were diverted off on branches running east and west. Riding along a branch road to a certain point then doing a “U” turn to ride back to the Great North Road. In the picture I had just done one of these "U" turns and was out of the saddle getting back up to speed. The whole event monitored by volunteer marshals and everyone checked to ensure they rode every part of the course.

When I say I rode non-stop I mean non-stop. I was held on the start line by a helper, and as the seconds counted down I strapped my feet into the pedals and they remained there for the entire twelve hours; my feet never touched the ground during that period. I carried food and drink with me, and more was handed up during the event. My favorite food to carry was rice pudding with raisins in it. My mother would bake it in the oven until it was semi solid but still moist and could be cut into rectangular pieces and wrapped in grease proof paper. This was before the time of plastic wrap and aluminum foil.

It was still officially dark when I started and I had to use battery lights. You can just see the tail light mounted above the rear brake. The heavy front lamp was clipped to my handlebars and I had dropped that off en-route by the time this picture was taken. In case you are wondering I did not have to pee the entire twelve hours; I guess perspiration removed any excess liquid from my body.


Friday
Dec232005

The Mechanics of Steering.


(Or is it the Physics of Steering?)

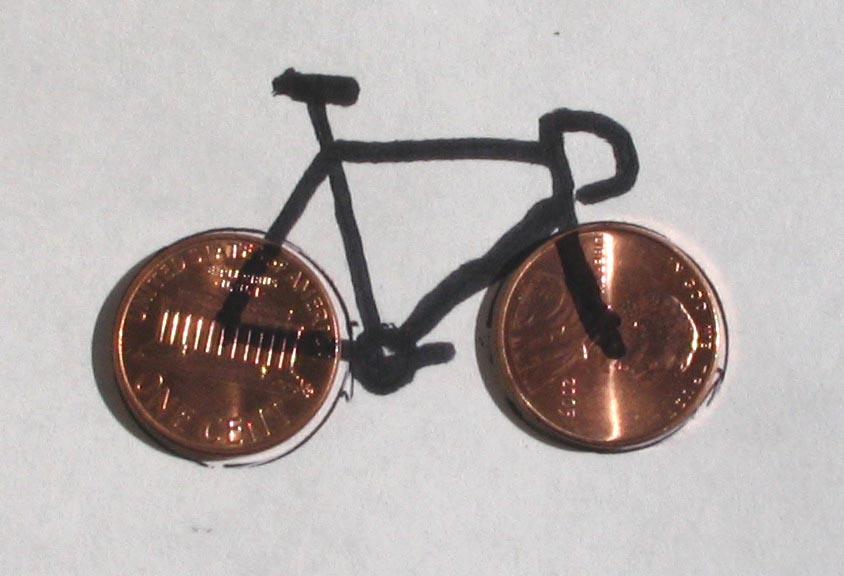
Roll a wheel or for that matter any round flat object even something as small as a coin on a flat surface and it will roll in a circle. It will continue rolling in ever decreasing circles until it finally falls and settles in one spot. This is a demonstration of the law of gyroscopics. That a spinning wheel will remain upright as long as it keeps spinning.

Most people know that this is what keeps a bicycle upright while in motion and if you stop you fall over as all cyclists do at least once in their lifetime. Also a spinning wheel (Or rolling coin.) as it looses momentum and starts to fall it will turn in the direction it is falling, which is why it rolls in a circle.

This law of physics gives a bicycle a simple built-in self steering capability. You can demonstrate this to yourself by holding a wheel in both hands by the spindle and spinning it. The first thing you will notice is that the wheel wants to stay upright in the same plane, demonstrating the first law mentioned in the opening paragraph.

If you forcibly move the top of the wheel to the left or right as it is spinning it will also turn in the direction you are leaning it. Just as a rolling coin will turn in the direction it is falling. So as you lean a bicycle into a corner it will steer itself around the corner. Let’s not forget the rear wheel. Although it is in a fixed position within the frame and cannot turn, it is still spinning and leaning therefore assisting in steering the bike around the corner.

This also explains the importance of a frame being straight with both wheels in the exact same plane. If a frame is twisted one wheel is always leaning and therefore always steering the bike in that direction. In normal riding conditions you may not even notice this as you will automatically and subconsciously correct this by steering in the opposite direction. But try riding hands off and the bike will pull to the left or right. Make sure you are on a level surface as a camber in the road will also cause you to move in that direction.

There are some who argue if it is the gyroscopic motion of a spinning wheel that keeps a bicycle upright, how come it is possible to ride at a slow walking pace? The answer is that it is not all gyroscopics, it is balance. The law in balancing anything is that the center of gravity of the object be directly over the point of contact with whatever the object is balancing on. In theory it should be possible to balance a golf ball on a pin head.

Someone walking on a high wire, as they start to fall to the left will shift their body, therefore their center of gravity to the right. Balancing a broom on your hand is a relatively easy trick because you simply move your hand in the direction the broom starts to fall keeping your hand directly under the broom’s center of gravity.

Have you noticed also that it is easier to balance a broom on your hand with the head of the broom up, than it is to balance a lightweight stick on your hand? The center of gravity of the lightweight stick is somewhere in its center, whereas the upturned broom has a center of gravity near the top where the head is.

A bicycle and rider has a high center of gravity; the bike can be twenty pounds or less while the rider is a hundred pounds or more. Center of gravity is somewhere in the middle of the rider, three feet or more from the ground. And just like the high center of gravity of the upturned broom, this works in favor of the bicycle and rider when it comes to balancing.

When riding very slowly, as the bike and rider fall to the left the bike turns to the left. The rider corrects this by steering to the right, then back again as the rider starts to fall in the opposite direction.  What the rider is doing is moving the bike from left to right under them just like moving your hand under the upturned broom. And just like the simple broom balancing trick there is no conscious thought process to this, it is automatic.