


Applying Fuso Decals
I am now making replacement decals for those wishing to have one of my frames repainted. I wanted to post these instructions here so that anyone refinishing one of my frames in the future will be able to refer back to this article. I am hoping also that others might find it interesting to know what went into the Fuso paint process.
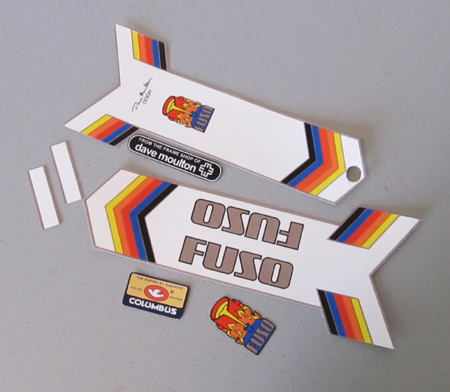
Fuso 1st. Generation Decals 1984 – 1986
The white decal panels are the “Peel and Stick” self adhesive type. The frames are painted in a two color paint scheme, with the decal covering where the two colors join.
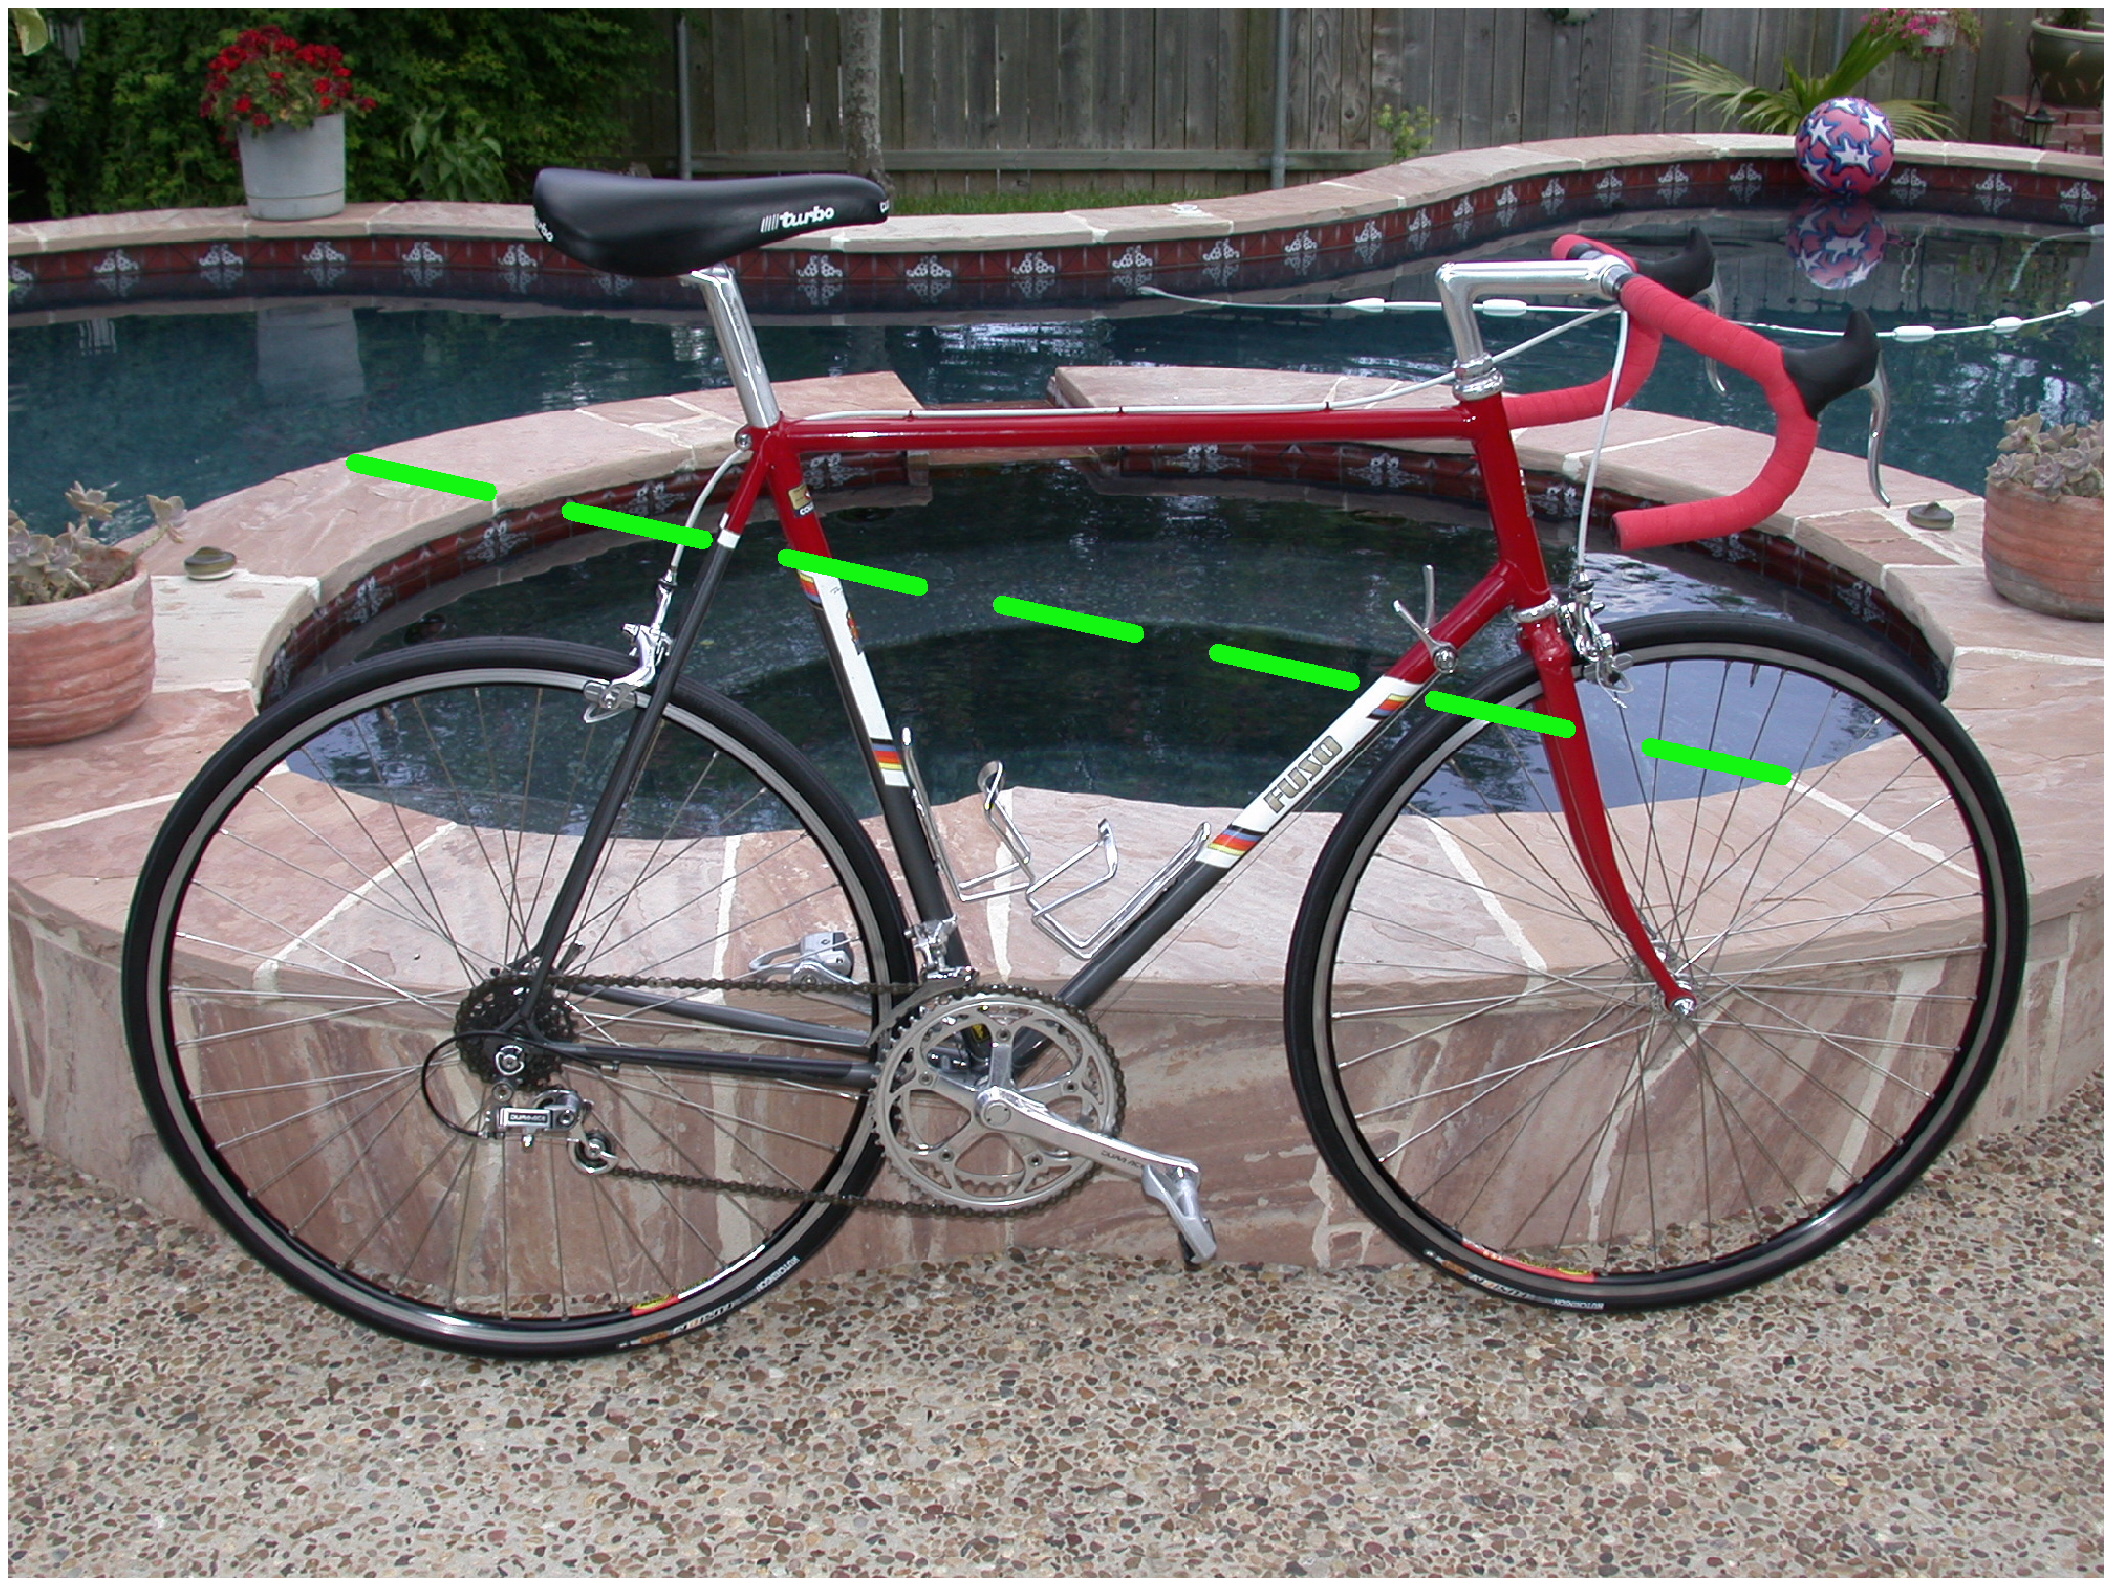
The top part of the decal forms a visual straight line diagonally across the frame shown in the above picture. Because of the camera angle it appears not to line up perfectly. But this is a visual effect anyway not necessarily a perfect straight line. However, painters have been known to put the down tube decal on upside down, which makes the chevrons go in opposite directions and spoils the whole affect. The decal panels are “Arrow” shaped and on both the seat and down tubes, the arrow points down towards the bottom bracket.
The down tube decal should be placed mid way between the top water bottle mount and the gear lever bosses. On the seat tube decal for frames smaller than 60cm. there is a hole pre-cut in the decal to go over the top water bottle boss. The position of this will vary according to frame size. The smallest frames will have 2 holes cut for both WB bosses.
With the position of the seat and down tube decals pretty much predetermined, it is then a matter of positioning the narrow white stripes that go around the rear seat stays so they visually align with the other two decals.
The easiest way to do this is with the frame in the primer coat stage, offer up the decals “Dry” with the backing still intact. Place masking tape to mark the top edge of the “V” shaped decal. Next place another piece of masking tape around the seat stays to line up with the tape on the seat and down tubes. This tape will mark the top edge of each decal including the seat stay stripes.
The two colors on the top and bottom part of the frame will meet 3/8 inch (1cm.) below the point of the wide “V” at the top of the seat and down tube decals. This can be masked straight around the tube, and the widest part of the decal will wrap around to cover the join in the paint. The seat stays will be masked ¼ inch (6mm.) below the tape marking the top, and again the stripes will cover the join.
It is best to paint the top part of the frame first. If you paint the bottom first you may get overspray on the bottom as you paint the top.
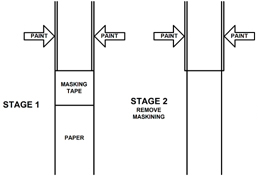
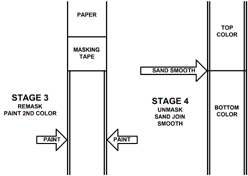
Take the time to mask and re-mask when applying the two colors as shown in the picture above; it will save headaches later because a “Step” in the paint will show under the decal. I used to spray 3 or 4 clear coats over the join before sanding. That way I was sanding clear coat rather that cut into the actual color coat where it might show if you sand outside the area covered by the decal.
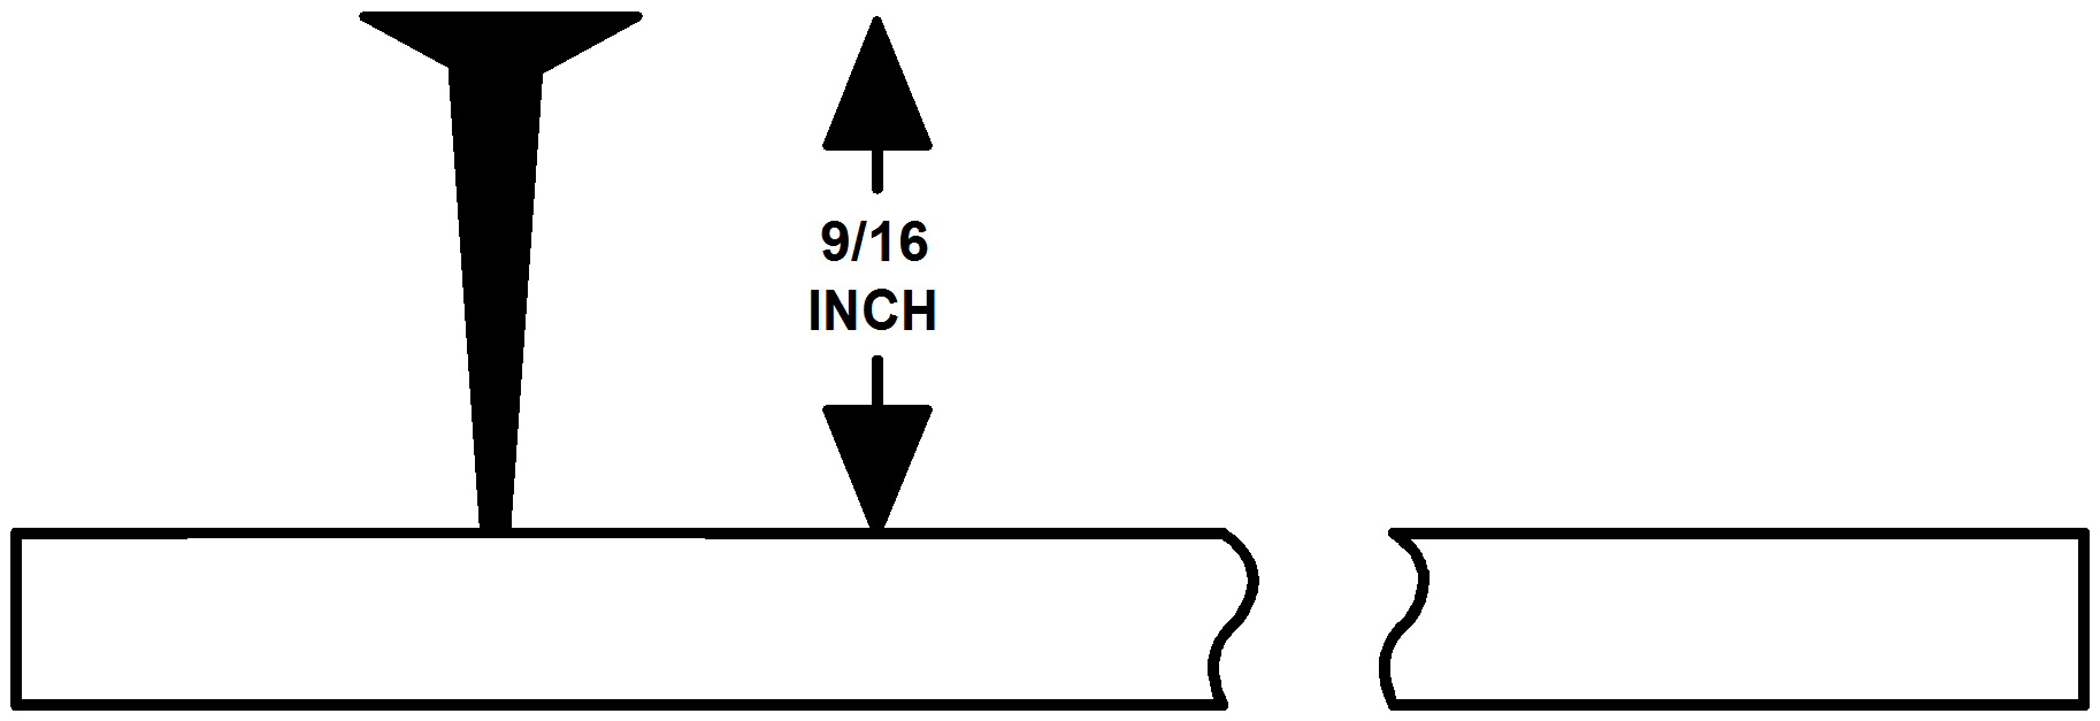
A useful tool to mark the center of the tubes to ensure correct alignment of the decals is a straight strip of wood or aluminum angle, long enough to lay across two tubes, and with a countersink head screw protruding 9/16 inch from the straight edge. 9/16” being half the 1 1/8 inch tube diameter of the seat and down tubes
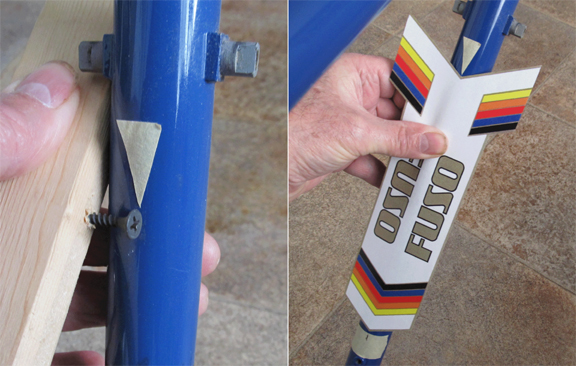
By applying small pieces of masking tape to the frame at the top and bottom of the decal you can mark the center by laying the straight edge across the seat and down tubes and make a pencil mark where the screw head meets the tape. Check from opposite sides of the frame to ensure you have the exact center. (If it is not center you will have a double mark.) A straight piece of masking tape at the bottom of the decal with a pencil center mark to coincide with the bottom point of the decal. A small triangle cut from masking tape (Like a sharp arrow point.) stuck to the frame tube to mark the center of the top “V” of the decal.
Once you are satisfied with the position of the decals, and have done several “Dry” practice runs; position the frame so that the tube you are working on is vertical. In other words if you are applying the down tube decal, have the frame in a vise or workstand so the down tube is vertical; even leaning towards you a degree or so. This will ensure that the decal will not accidentally flop around the tube and stick before you intended it to.
Peel the paper backing from the decal from the bottom pointed end. Hold the decal between your thumb and first finger; one hand at the top and one at the bottom. Align the decal with the masking tape markers and touch to the frame. If the seat tube decal has a hole punched in it to clear the WB boss; place the decal over the boss first then align the top with the masking tape marker.
I always used a paper towel folded into a wad about 2 inches square, to smooth down the decal. With an up and down motion lightly smooth down from the center and work around the tube on one side only. Then the other side; the widest part of the decal should wrap all the way round the tube and overlap slightly. Try to avoid creases, however, small air bubbles can be fixed by pricking them with an Exacto knife then smoothing them down some more.
Allow 24 hours for the adhesive on the decals to cure thoroughly, before clear coating over the whole frame. Imron clear coat will protect the decals from UV damage and fading.
Finally for all Fuso and Recherche owners, NEVER let a shop mechanic clamp the frame in a work stand around the decal as this will mark them permanently. I have failed to tell a mechanic this because I didn’t want to insult their intelligence and lived to regret it.
Addendum July 2017.
I now make the decal panels that are printed on white adhesive vinyl, with a clear vinyl film laminated over the printing to protect it from UV light. So with these no further clear coat is needed. You can remove the old decals and replace them without re-painting the frame, if the finish is otherwise good.
Before removing the old decals mark the centers with masking tape, top and bottom, as described in the article above. This way you will be sure the new decals are positioned in the exact place as the old ones.
A painter’s hot air gun is useful to soften the old decals to facilitate their removal. (A hairdryer may work as a substitute.) Start by warming the decal at the edges, and pick at one corner, with a thumbnail, where the edges of the decal meet at the back of the tube.
After removing the old decals, make sure the tube underneath is relatively smooth with no lumps of glue or old decal remaining. If so further scraping may be needed. If necessary, use a mild solvent like white spirit, (Paint thinner.) but make sure the solvent has completely dried, (Overnight if necessary.) before applying the new decal. Traces of solvent may impair adhesion.
Follow the directions in the article above, to apply the new decals. If you have questions, email me, Dave Moulton. An email link is in the right side column of this page.


 Fuso
Fuso 
Reader Comments (3)
Do you have to be SO FUSO about this?
How do we order the decals? Are there any frame painters you are particularly pleased with?
Todd,
My email to order is on this page. Right column under the ads. I am hoping to develop a list of painters and would like to hear from painters and people who can recommend painters they have used.
Dave