


Candy Apple Paint
If you don’t already know, a Candy-Apple paint finish is a two-step process. First a base color is applied, metallic gold for example, then a special translucent paint in a color of choice is sprayed over. The result is a finish of great depth and beauty.
One can see the sparkling metallic gold under the semi-transparent red, blue or green top coat. Just like seeing the apple under its candy coating. Hence the name.
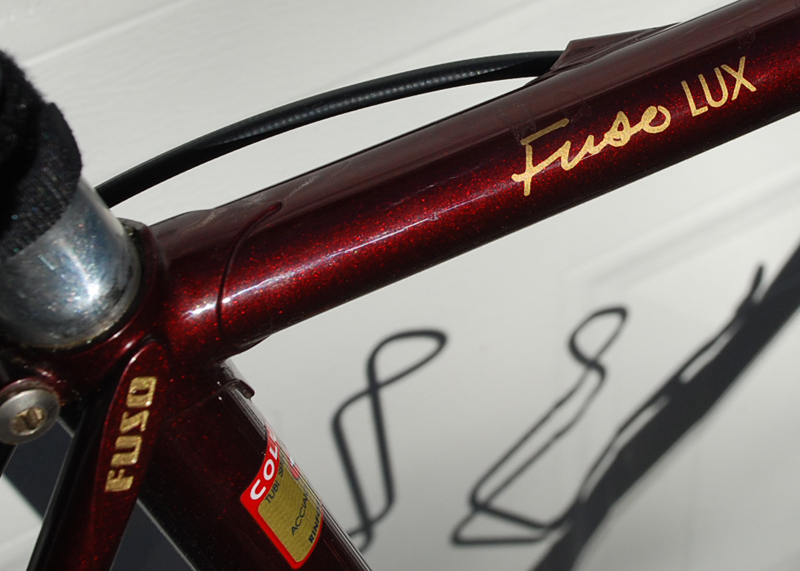
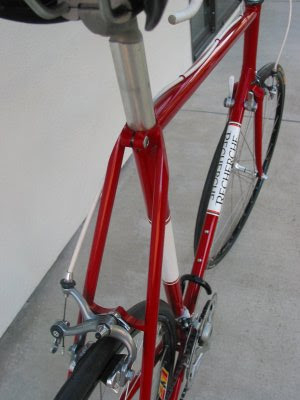
The picture above is an example. The gold FUSO name on the down tube is actually the base coat, it was masked off, then the red candy apple was sprayed on, and the mask was removed after.
 When I went to work for Masi in Southern California at the end of 1980, I was amazed at the beautiful paint work coming out of the shop.
Not only by Jim Allen, Masi’s painter, but former Masi painters, Brian Baylis, and Jim Cunningham of Cyclart, who were all sharing the same premises and paint booth.
At that time I had been painting my own frames for a number of years, so I knew how to handle a paint gun, but what I didn’t know were the little “Tricks of the Trade” it took to bring a paint finish up to the next level.
Like for example, spraying 6 or 8 clear coats over decals, then when dry, sanding smooth with very fine 600 grit paper, before applying a final clear coat. The result was a perfectly smooth finish with the decals completely buried under clear coats, with not even the slightest ripple in the top surface above the decal.
I also learned about candy apple finishes. One of the ways it was used, you would not even be aware that it is a candy apple finish. That is when used to produce a brilliant red finish. Red is one of the most difficult colors to paint and look half way decent.
The reason is the best red pigment is made from Cadmium. But it is no longer used in modern paint, because it is highly toxic and very expensive. So synthetic pigments are used, and the finished job ends up looking slightly orange. Not a true red. Red paint is also prone to fade over time when exposed to sunlight.
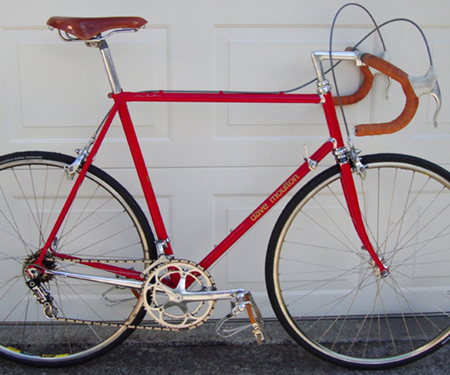
What I learned was the spray a candy apple red over a bright white base coat. What you see is the light reflecting back on the white undercoat, through the red translucent top coat. The result is a really intense deep red. A true red color.
This process was not easy, because if the red was sprayed unevenly it would appear a darker or lighter shade in places where the paint was applied in heavier of lighter coats. For example, as you spray paint along the individual tubes of the frame there is a tendency to get a buildup of paint around the lugs.
 If not careful, the lugs would appear darker that the main tubes. Or there might be dark blotches where the paint overlapped.
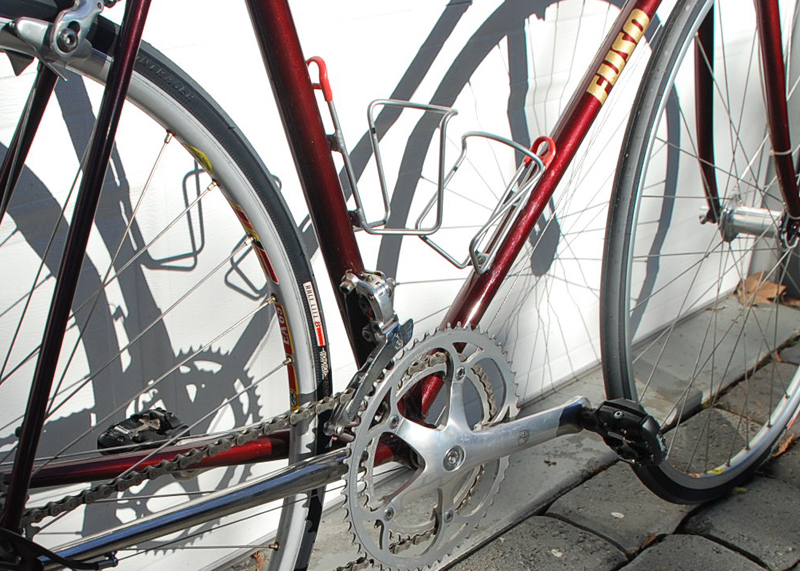
Many do not know that even on my production Fuso and Recherche frames this same candy apple red was used.
(Above and Right) But instead of a white base, I sprayed over a bright orange base coat.
The red appeared only slightly darker, but spraying over orange was a little more forgiving, therefore easier than over a pure white base.
Some of these frames are 30 years old and the red paint has not faded, the red is still as vibrant as the day it left my shop.

In the example above. The frame was painted dark metallic blue, and white decals applied. Next a candy apple red was sprayed over all, and the end result is a deep burgundy main color with red decals. Taking on a purple-ish hue in bright sunlight.
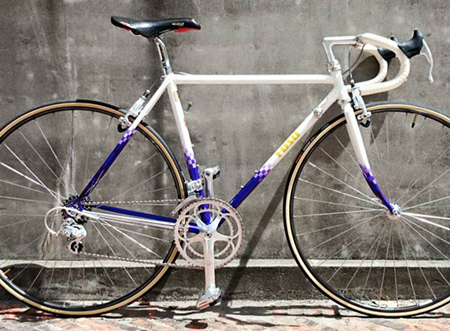
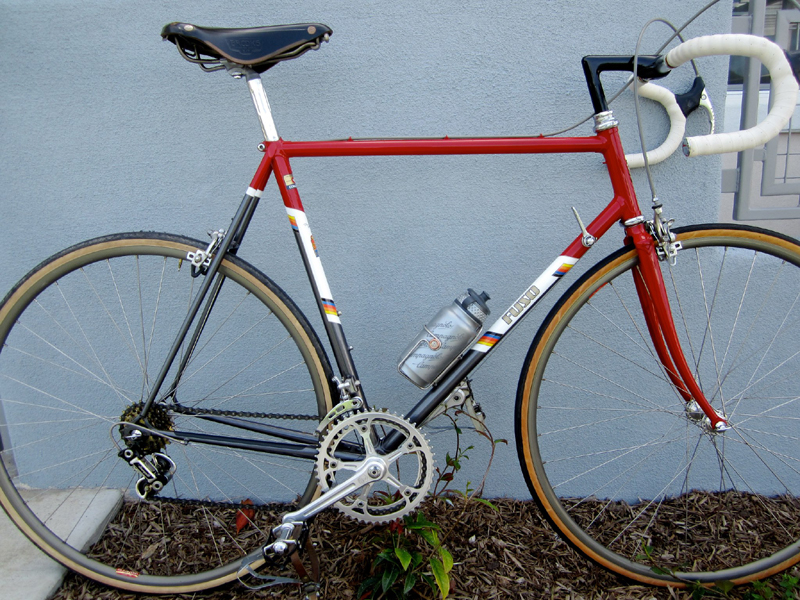
Finally, this Fuso Lux frame was first painted white all over. Then a candy apple purple was sprayed on the bottom section only. The white acting as the base coat. Where the color fade transition takes place, the tubes were masked off in a checker board fashion. The purple was faded over this masking which was removed when the paint was dry.
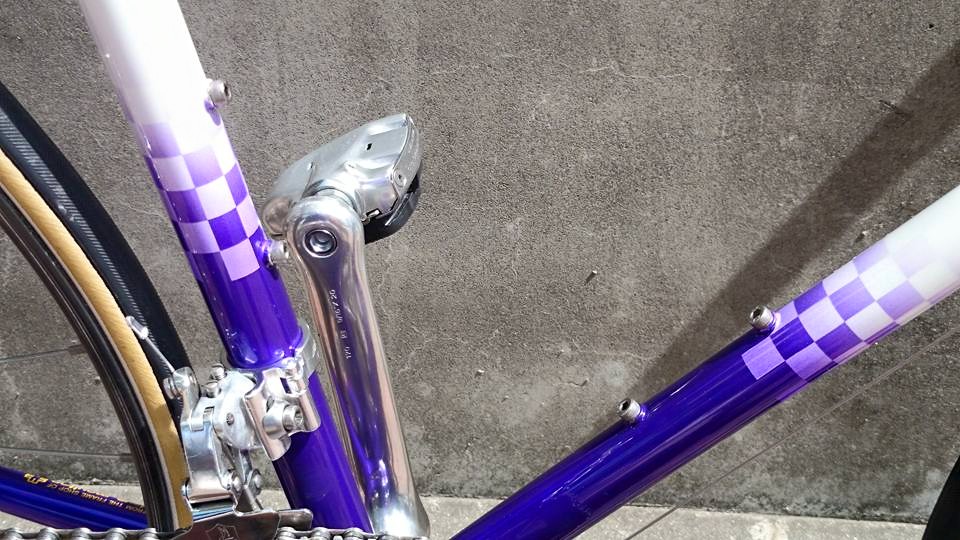
Then I came back a final coat of the purple, and sprayed slightly overlapping the white squares. The effect is a checkered pattern that appears to fade in from the purple, and then disappear into the white. It also demonstrates the effect of lighter and heavier coats of the candy apple paint that I mentioned earlier.

To Share click "Share Article" below
 Dave Moulton
Reader Comments (11)
Candy apple paint is something that became popular for custom cars and hot rods back in the 1950s and 60s. How similar is it to flamboyant paint that was available on British bikes back in the 1950s. Seems it's done the same way,
johnb,
Flamboyant was the exact same thing. In England Candy Apples are called Toffee Apples, Doesn't have quite the same magic. Toffee Apple Paint.
Dave.
As always, more information and insight into the process of frame building, in this case the oft-overlooked "finishing," thank you! The black+red=burgundy is amazing, and don't forget the white-to-red decals, wow. Lastly, I'm rather bowled over by the last example, the purple to white checkerboard fade... particularly the very last pass, the purple fade over the white squares- an absolutely subtle, but sublimely complete treatment! Really makes a production powder coat seem like little more than rust-proofing.
thank you admin. I needed to know these things.
Thanks Dave, a really great post! I suddenly feel like the paint job on my old Bianchi or any of the powder coated frames so popular today are pretty pathetic. I feel like I actually got smarter today! Thank you.
Looks like the notorious Campagnolo SGR pedals on the checkerboard bike...
I knew you were a master framebuilder, but not you were a master painter too. Great job!
It's hard to believe that you are a ridicules painter :D
I worked for an automotive paint company in the UK for most of the 1980s. Back then base/clearcoat systems were in their infancy, at least in the car world, and confined to a portion of the metallic finishes. Basecoats were not used over "solid" (non-metallic) colors at the time. I'm not sure how this translates to normal practice in bike frame painting of the day, but I suspect that Dave was ahead of his time.
i meant to say in my previous comment that "clearcoats were not used over solid colors at the time"!
Some truly beautiful paintwork there! Now I know what to do if I get bored with the colour of my bike. I rather suspect, however, that any attempt would be a distantly pale imitation. Inspiring, nonetheless!