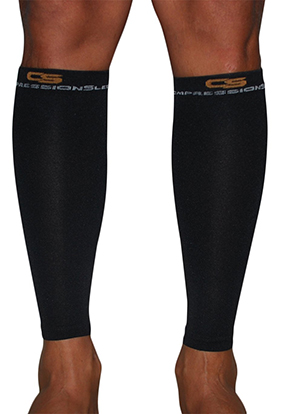
Compression Sleek Sleeves
 Elastic support hose or stockings have been prescribed in the medical profession for years as a remedy for poor circulation in the legs.
My mother suffered from Phlebitis and Varicose Veins as long as I can remember.
Back in the 1940s she would bind her legs with crepe bandages. Later elastic support stockings became available.
It appears that binding the legs or wearing stretchy sleeves or stockings actually improves circulation.
And if blood circulation is improved, would this not be of benefit to athletic performance and/or recovery? In recent times runners have been using compression sleeves, as a means to avoid shin splints, which are often caused by the jarring effect of the heel striking the hard pavement.
Shin splints are not usually an issue for cyclists, unless they are pushing some exceptionally large gear, but I do know there is a UCI regulation that stipulates the length of socks used when racing. The thinking behind this is, they don’t want racing cyclists wearing knee high support hose that may or may not improve performance.
Some cyclists are using compression leg sleeves and tights, before and after races. When the makers of Compression Sleek sleeves offered the send me a pair to try out, I was interested. The reason being this time of year when the weather improves, my bike rides tend to get longer.
After a long hard ride, (Especially early season when I am not used to it.) I tend to get night cramps in my calf muscles. I’ll wake from a deep sleep with a large painful knot in my calf, I’ll invariably reach down to massage it, and bending my leg to do so, end up with an even bigger knot in my thigh. There is nothing I could do but get up and walk it off.
Last Sunday I did a longish ride, and sure enough that night I started to feel a cramp coming on in my left calf muscle. I got up and slipped on just the left sleeve and went back to bed. It worked, no more cramps that night.
Not just long bike rides will cause these cramps, but every autumn, cleaning leaves from my gutters, and standing on a ladder for long periods, will cause the same cramps.
Also attending an event like a bike show where I am standing on a concrete floor for hours. You can bet in the future on these occasions I will be wearing these sleeves as a precautionary measure.
I have worn them on a couple of early morning rides when the temps were chilly. They doubled as lower leg warmers, when I wore them with my black over the knee bib knickers.
Wearing them while riding I didn’t notice any obvious benefit, but they were no hindrance either. I would not wear them with shorts, any more than I would wear knee length socks, because of the “Fred” factor. But that's just me.
These Compression Sleek Sleeves are available on Amazon for $21.99 for a pair. Some compression sleeves appear cheaper but are sold singly, so watch out for that one. You can also pay a lot more, but I am not sure what the added benefit would be.
Made of 85% Lycra and 15% Nylon, I just throw them in the cold wash with the rest of my kit, but I let them air dry rather than put them in the dryer. I figure they may last longer that way.
Measure your calf before you buy. These fit from 12 inch to 15 inch calf circumference. My calf measures 14 inches, so they are tight, but as I said, not uncomfortable to wear, even while riding.

To Share click "Share Article" below
 Dave Moulton